|
|
||||||||||||||||||||||||||||||||||||||||||
|
||||||||||||||||||||||||||||||||||||||||||
|
Privacy Policy | Editorial Policy | Profit Policy | Join the Association | List of Members | Contact us | Index | Links |
||||||||||||||||||||||||||||||||||||||||||
|
Back Go to page: 1 2 3 4 5 6 7 8 9 10 11 12 13 14 15 16 17 18 19 20 Forward
|
||||||||||||||||||||||||||||||||||||||||||
|
Computers and Stuff.
Sam Houliston.
|
||||||||||||||||||||||||||||||||||||||||||
|
Report scams to the ACCC via www.scamwatch.gov.au or by calling 1300 795 995.
|
||||||||||||||||||||||||||||||||||||||||||
|
Scammers.
Scammers have set up a clone of the myGov website to trick you into sharing your login and bank account details.
The scam starts with a phishing email that looks like it is from Medicare, asking you to update your Electronic Funds Transfer (EFT) details, so you can start receiving payments for Medicare benefits and claims.
If you click on the link in the email you are taken a replica of the real myGov website. You’ll note the URL includes ‘.net’ instead of ‘.gov.au’, which is an indication the website is not a legitimate Australian Government domain!
If you input your login details you are directed to also enter your secret security question and answer, before you’re taken to the fake Medicare website to input your bank account details.
These emails and web pages feature myGov and Medicare design and branding, making them appear legitimate.
Remember, clicking on the link and sharing your details gives these scammers access to your personal information, which they then use to steal your money and identity.
See HERE for further details.
|
||||||||||||||||||||||||||||||||||||||||||
|
|
||||||||||||||||||||||||||||||||||||||||||
|
Windows 10 Features: The Good, the Bad, and the Ugly.
For such a large and complex operating system like Windows 10, there are obviously features Microsoft got completely right and then some that ... not so much.
Now that we have lived with the various versions and updates of Microsoft’s latest OS, it’s time we conducted a postmortem of all that Windows 10 comprises? What do we like and what are our pet peeves?
To get underway with this, Feature-By-Feature, here are the first three guinea pigs under the glass: Automatic Updates, the Start menu and Cortana.
Automatic Updates
Until Windows 10, updates and patches were user customizable. You could select which ones to install or choose not to install any. Those days are over. With Windows 10, all updates are foisted on users whether they like it or not. In fact the only ways to avoid having them installed is to disconnect from the Internet.
The good: The updates include the latest security patches and feature improvements and they come on a scheduled basis, so you don't have to make time for upgrades. And emergency fixes will get pushed to you. Starting with the Autumn Creators Update (1709), Microsoft included ransomware protection as part of its routine security updates. The four components of what it calls Windows Defender Exploit Guard are designed to lock down the device against a wide variety of attack vectors and block behaviours commonly used in malware attacks, while enabling enterprises to balance their security risk and productivity requirements.
Users can also choose the time updates can and cannot be installed. And for the 21 people still using dial up modems or for those folks with metered (i.e. pay by the minute) accounts, they can modify the advanced update settings so no installs are made – at least for a set amount of time.
The bad: When a patch causes problems and prevents us from using Windows to any degree, there is an arcane way to uninstall the troublesome patch. Time consuming and frustrating, the process of applying a patch should have been more thoroughly tested is a major downside of automatic updates. In the past, you could check the install/wait advise before okaying an update. Now we read about what shouldn’t have been after the fact. We can’t cherry pick the patches we want to install.
The ugly: You press Shut-down but the message reads “Working on updates. Don’t turn off your computer.” Next time you boot up the PC and get a message, "Please wait while updates are installed." Yes, updates are all about intruding on our time when we least expect it.
Some thoughts: Those who leave their computers switched on all the
time, restarting it when prompted to do so, have the fewest problems with
updates getting in the way and slowing things down. But - you may not want
to leave your PC switched on all of the time, after all it’s less
Note that if you have a laptop, you can configure the power button to turn off the screen (and do nothing else) when tapped, while still powering down the computer if you press the button for a few seconds. At the moment the way to do this configuration is through the ‘Power Options’ on Control panel, selecting ‘Choose what the power buttons do’.
For the settings discussed, there is no perfect configuration for everyone, it depends on your pattern of use, whether it’s a desktop PC or a laptop, whether it stays in the one spot or not, how often you return to use it again, and no doubt many other things.
Start Menu.
The good: It used to be labelled Start but in Windows 10 it got a demotion to an untitled Windows icon. Like all things Microsoft, it all got bigger and ever more customizable. The customization is essential since the jumble of “tiles” on the display can actually make it difficult to find what we are looking for.
While all the apps, functions and features are listed in the left vertical column, similar to previous Start menus, it’s the system of tiles propagated on the right that provides a unique place to add frequently used apps, websites, and Windows functions. Tiles associated with Internet-sourced services like weather and news by default are ‘live’ in that they flash streamed updates. (The persistently blinking of the live tiles can be annoying for some users, and with a right-click can be turned off.)
|
||||||||||||||||||||||||||||||||||||||||||
|
|
||||||||||||||||||||||||||||||||||||||||||
|
The default set of titles does include some useful apps amid the revenue-baiting games, but an easy right-click on those can ditch them, simplifying the display. (If you have a touch screen right-click by holding your finger down for a second.) Customization extends to drag and drop organization, putting the tile where you want it. Resizing of the tile palette is accomplished by just grabbing the right border and pull to the left to shrink it. Resizing a tile is a right-click away and that left column is alphabetized; clicking the letter atop each group will bring up an index of each letter to quickly jump to the one you want instead of having to scroll down until you reach it.
For folks who prefer the olden days of Windows 7 and want a no-tile look, simply right-click each tile and choose Unpin from Start. When the last tile is eliminated, just the left column Start menu, a la Windows 7, will remain. You can personalise your Start Menu by going to "Settings", then click "Start"
The bad: The argument can be made that Microsoft went overboard with its tiled Start menu. The default Start is a confusing mess, what with the alphabetized left column and the random tile set which requires users to handle the heavy lifting of futzing with customization. While the Windows 10 Start was created in reaction to user disdain for all that was in Windows 8 and what users liked in Windows 7, the hybrid which resulted is sort of a FrankenWindows to meet the dual needs of touchscreens and mice.
The ugly: See the bad.
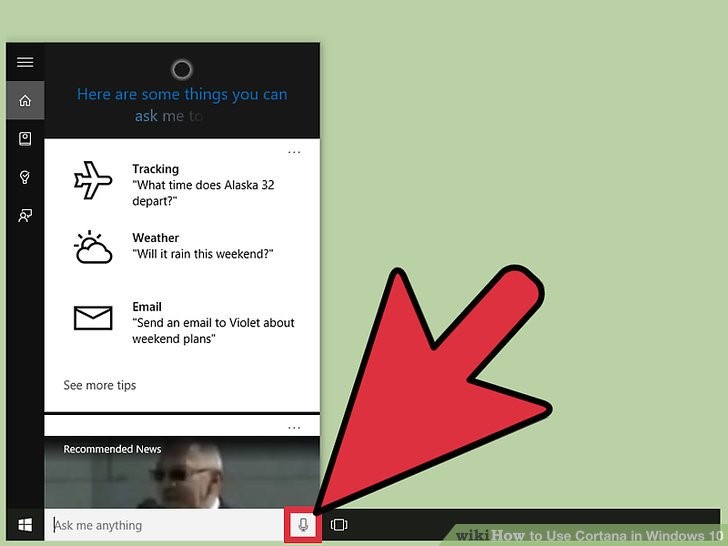
Cortana
The good: Following in the footsteps of Apple’s Siri, Microsoft introduced Cortana in Windows Phone first and then went all-out with its integration in Windows 10. Named for a character in the Xbox game Halo, Cortana is even voiced by the actress from the game, Jen Taylor.
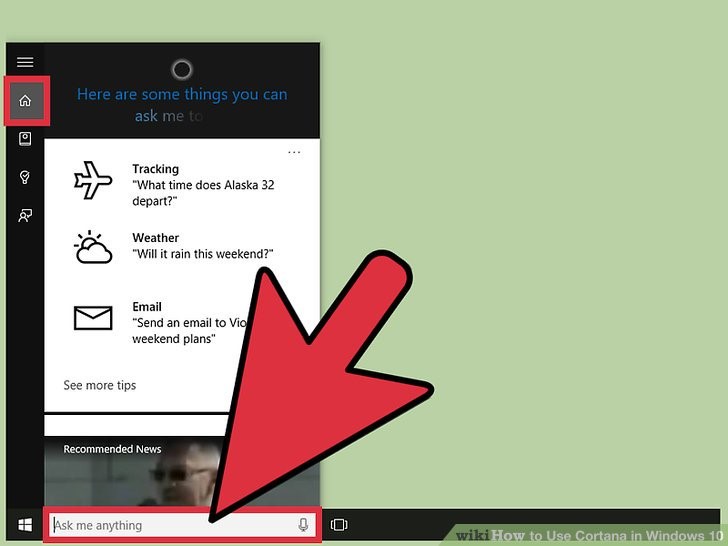
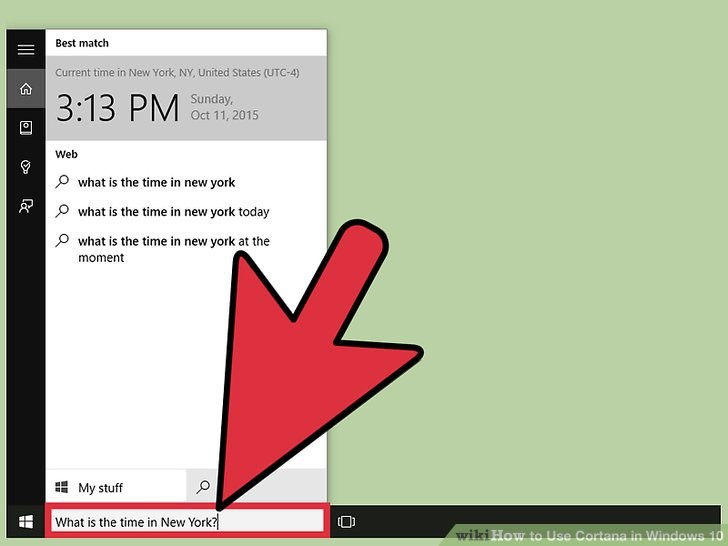
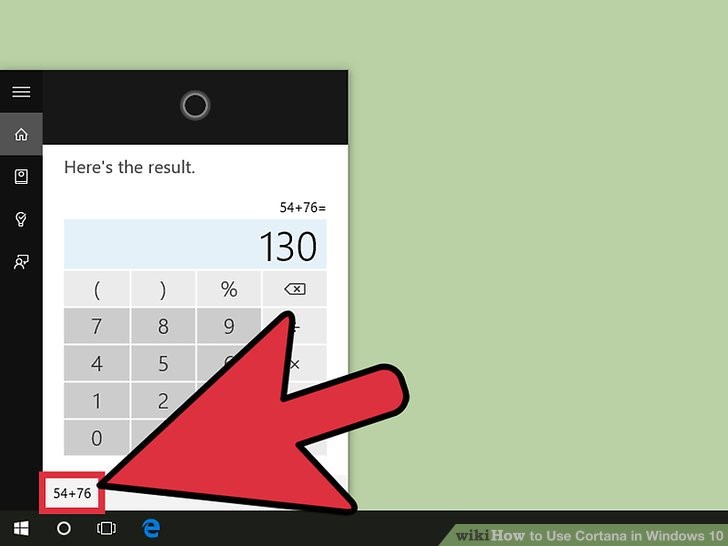
Cortana gets better as it learns from your queries. It handles basics like reminders of shopping lists and appointments, looks up contacts, tells you the weather, stock quotes, sports scores, and flight status. If you are using Windows Mail, Cortana will even scan package delivery notices and check their expected arrivals.
Cortana can take dictation and produces nearly accurate results. When you use a phrase with the word about that prompts Cortana to start an email. While that hands-free ability is--to pardon the pun—handy, depending on your email app it does invariably require some hands-on touch ups. Cortana can try to identify music that is playing, use Windows Maps to quote distances, store hours, give traffic reports, and pinpoint addresses. What Cortana delivers to you is all set up in its own, comprehensive Settings menu.
Indeed with each feature update of Windows 10 Cortana’s versatility has gotten better at answering whatever query you throw at her. But like digital assistants Siri and Amazon’s Alexa, she is not foolproof and will tell you that when she can’t come up with the right answer or, indeed, any answer.
The bad: In order to get Cortana services, you seemingly have to sign your life away to Microsoft. The company states that its intention in harvesting your data is to make Cortana work better for you and every other Cortana user. Okay, that is the basic principal behind AI processing, but while Microsoft adds that it does not use the information to sell targeted ads, on the other hand it does use some data it gets from you from outside of Cortana (such as the Edge browser) for targeted ads.
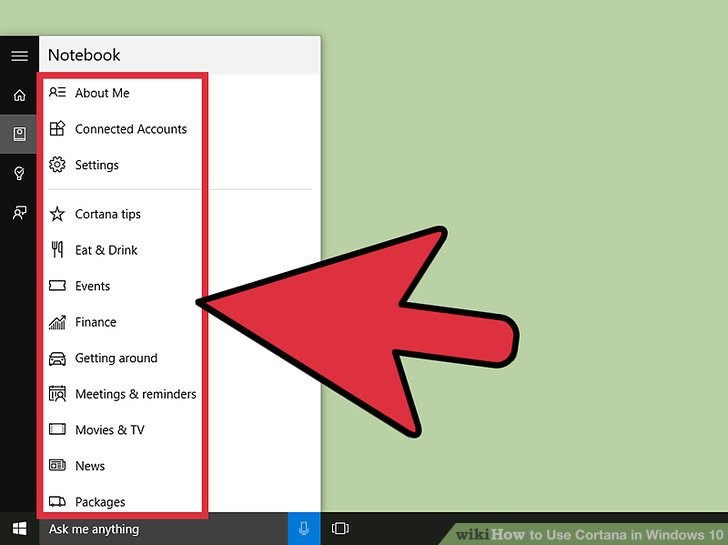
Cortana, by its nature, and from your setup entries, will know where you live and keep a record in its Notebook, of everything you ask or search. (George Orwell had the right idea about Big Brother, he just had the wrong year.)
If you don’t like the idea that Microsoft is reading your digital tracks, you can click “No thanks” and not use Cortana. Its search bar reverts to a Start menu text entry only.
The ugly: You need some time and patience to read through Microsoft’s Cortana privacy explanation. While it is short on the expected legalese, it does take longer than a laundry spin cycle to read and absorb it thoroughly. It might give you pause and none of it is pretty. But it is definitely worthwhile information to understand before setting up Cortana or even after you have.
|
||||||||||||||||||||||||||||||||||||||||||
|
Paddy is said to be shocked at finding out all his cows have Bluetongue. "Be Jeysus!" he said, "I didn't even know they had mobile phones!"
|
||||||||||||||||||||||||||||||||||||||||||
|
|
||||||||||||||||||||||||||||||||||||||||||
|
|
||||||||||||||||||||||||||||||||||||||||||
|
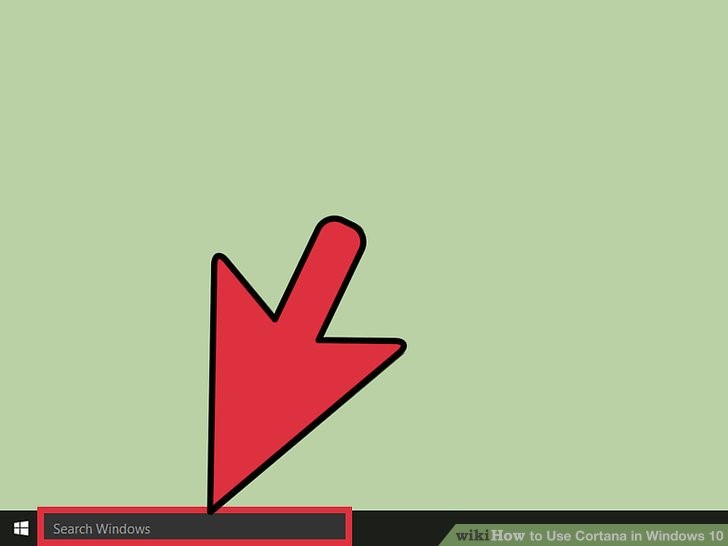
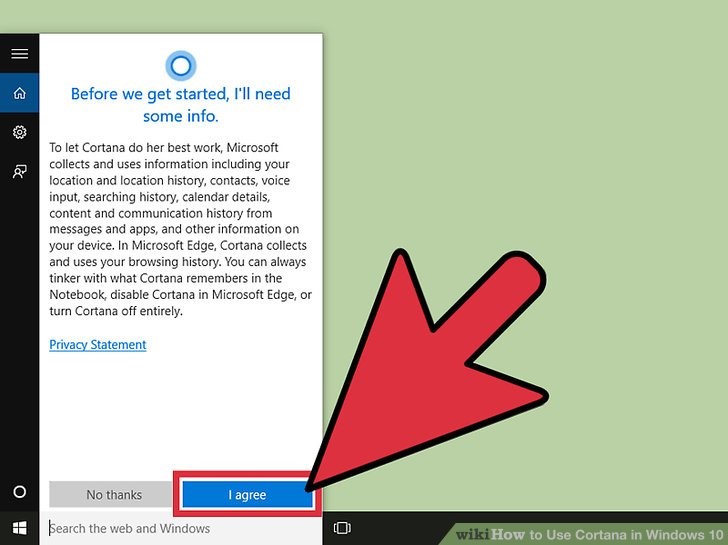
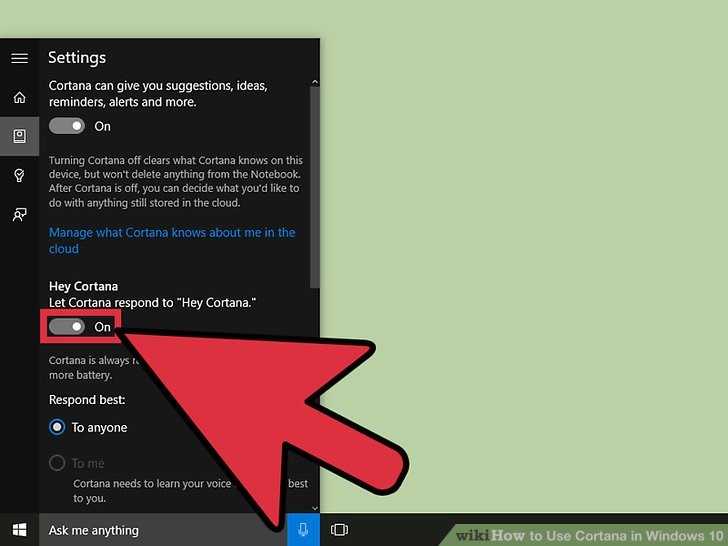
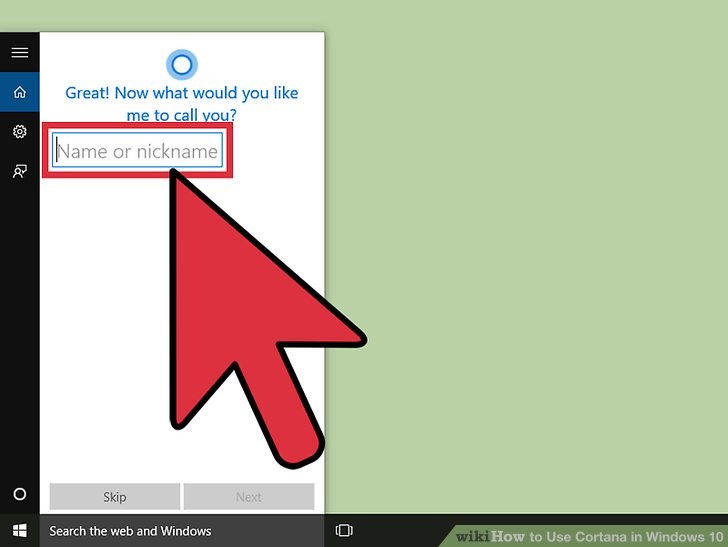
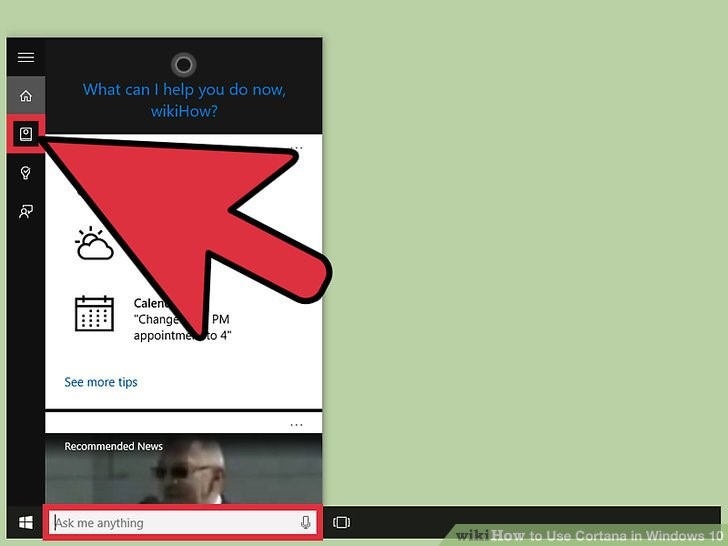
Cortana.
Cortana can be very handy and at first can be a bit confusing to set up. If you want to use it, here’s how!
Setting Up Cortana
|
||||||||||||||||||||||||||||||||||||||||||
|
||||||||||||||||||||||||||||||||||||||||||
|
|
||||||||||||||||||||||||||||||||||||||||||
 |
||||||||||||||||||||||||||||||||||||||||||
|
|
||||||||||||||||||||||||||||||||||||||||||
|
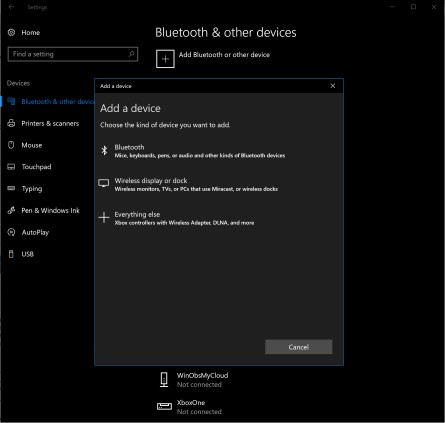
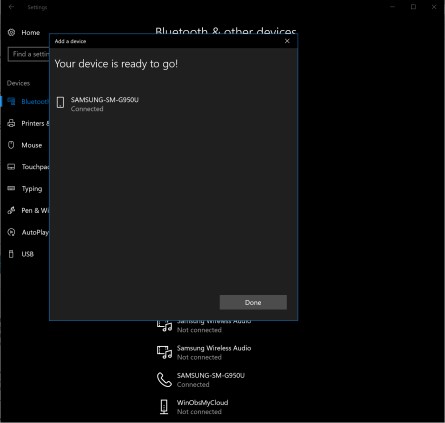
What is Dynamic Lock used for in Windows 10?
When Microsoft introduced Windows 10 almost three years ago, one of the unique features that would be part of the new operating system was Windows Hello, a feature that would use biometrics to allow end users to log into their Windows 10 devices (so long as the device could support the technology).
In last year’s Windows 10 Creators Update, Microsoft added a counterpart to Windows Hello with Dynamic Lock – jokingly referred to as Windows Goodbye – a feature to help to secure your Windows 10 device when you walk away from it.
Dynamic Lock uses the proximity of a Bluetooth device such as a smartphone, headset, or any other paired device that you have around your computer to automatically lock your device once the paired item is out of range. For most people, their smartphone is the most likely device that will be used for this purpose, as we all usually pick up our phones as we leave our desks.
And of course, when you come back to your desk it automatically unlocks.
The amount of time your paired device needs to be out of range is about one minute according to Microsoft. That will vary depending on the strength of Bluetooth on your paired hardware and other environmental factors in your home or office.
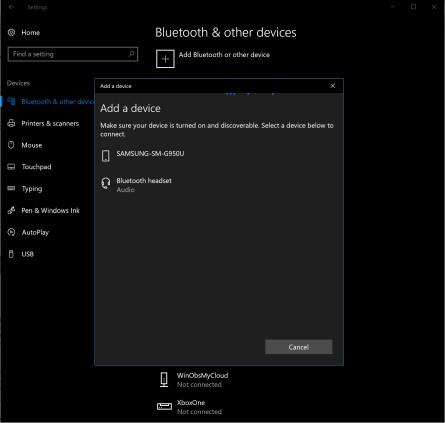
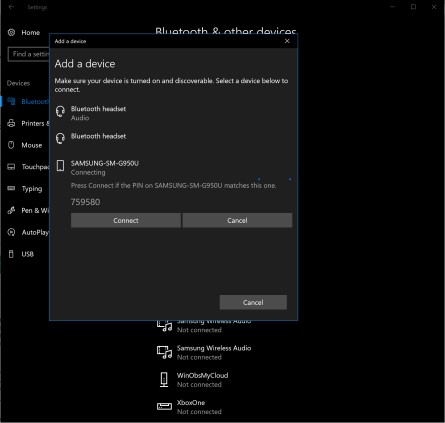
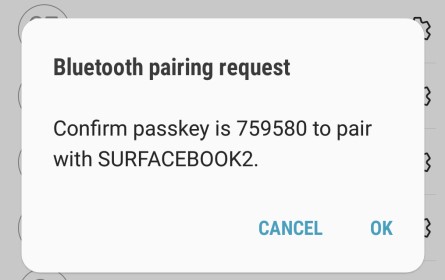
The process of setting up Dynamic Lock is very easy: it only requires the pairing of your Bluetooth device to the Windows 10 computer, then toggling on the Dynamic Lock setting.
|
||||||||||||||||||||||||||||||||||||||||||
|
Here's how it works.
|
||||||||||||||||||||||||||||||||||||||||||
|
||||||||||||||||||||||||||||||||||||||||||
|
|
||||||||||||||||||||||||||||||||||||||||||
|
|
||||||||||||||||||||||||||||||||||||||||||
|
|
||||||||||||||||||||||||||||||||||||||||||
|
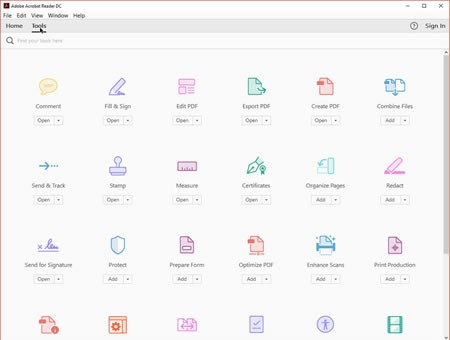
How to Edit PDF Files for Free
You can edit PDF files without having to shell out big bucks for the full Adobe Acrobat program. Someone has sent you a PDF file for your review or responses. Now you need to fill out text fields, add a signature, or insert comments to the file.
Perhaps you’ve discovered a typo or other error that needs to be corrected or changed on your end. Or maybe you need to delete or rearrange pages in the file. Yes, you can edit the file with the full version of Adobe Acrobat. But that’s an expensive program, especially if you don’t need it on an ongoing basis.
Instead, you can turn to some free tools to edit the file.
The free Adobe Acrobat Reader is designed mainly for displaying PDF files, but you can perform basic manoeuvres, such as adding text, highlighting specific areas, and inserting your signature. For more advanced editing, including the ability to delete and reorder pages, PDFescape and CutePDF are two free online PDF editors. The free, open-source PDFsam Basic is another helpful PDF editor.
And last, but not least, Microsoft Word can come to your rescue. You can import a PDF into Word, make your changes, and then export it back into a PDF. Let’s check out some different tools and techniques for editing PDF files.
Adobe Acrobat Reader
If you don’t have the latest version of Adobe Acrobat Reader DC, download it from HERE. After you’ve installed it, open the program and click on the Tools menu. With some exceptions, any tool that has the word Open under it is a feature built into Acrobat Reader. Any tool that has the word Add under it is a feature that requires the full Adobe Acrobat program.
Some tools, such as the ones to export or create PDFs require some type of subscription or purchase. But you can still freely insert text as well as sign and add comments to the PDF via Reader.
Open a PDF that you want to tweak. You can click on File, then Open, and then browse to and select the PDF, or you can double-click on the PDF from Windows Explorer or File Explorer to open it in Acrobat Reader.
To access the full array of tweaking tools, click on View, hover over
Show/Hide, and then click on Tools Pane. To add a comment to the PDF, click
on Comment. Using the different icons on the Comment toolbar, you can add
text, create a sticky note, highlight text, and draw lines and other
objects. As
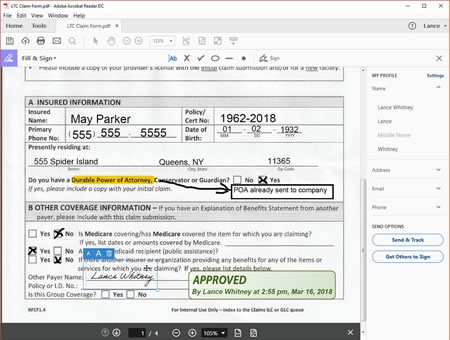
As another example, you can sign the PDF. Return to the Tools pane and click on the option for Fill & Sign. At the Fill & Sign toolbar, click on the Sign icon. The first time you do this, click on the command to Add Signature. You can now type your name, draw your signature if your device has a touchscreen, or upload an image of your signature. Click Apply and then click on the PDF where you want to add your signature.
Once you add your signature, however, you can no longer edit the PDF in Reader. When you’re finished, save the PDF file. You can now send it back to the source, print it, or file it for your records.
Okay, maybe you need to do more than just add text, comments, or drawings to the PDF. Let’s check out three free PDF editors.
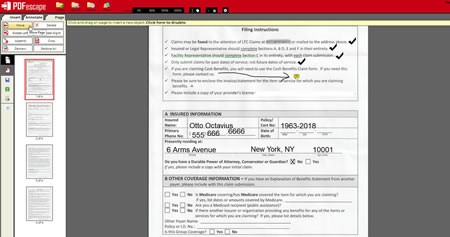
PDFescape.
PDFescape is available in two versions: online and desktop. The basic flavour of both versions is free but poses certain restrictions, such as the maximum file size and maximum number of pages per file. But it should do the trick for most PDFs. If you need more, a premium edition runs $2.99 a month, while an ultimate edition costs $5.99 a month when billed annually.
We’ll check out the free online version to see what it offers.
Launch the PDFescape Online PDF Editor and upload the PDF you want to edit. From the Insert tab, you can add text, an image, and a hyperlink. You can white out any content, draw an image by freehand, and create a form field.
From the Annotate tab, you can add a sticky note or rectangle. You can insert, underline, highlight, and strike out text and from the Page tab, you can move, rotate, append, delete, and crop entire pages. When done, save your revised PDF file.
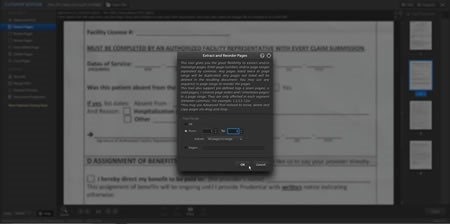
CutePDF.
Designed to help you move, delete, and merge pages in a PDF file, the CutePDF Editor is also accessible as both online and desktop versions.
To use the online CutePDF Editor, just launch it from its webpage and open your PDF file. From the editor, you can move, delete, duplicate, rotate, and reorder pages. You can extract, resize, and crop pages.
You can also merge multiple PDF files into one single file, either entire files or just selected pages. And you can secure a PDF file with a password and a specific encryption level. When you’re finished, you can save and print your final PDF.
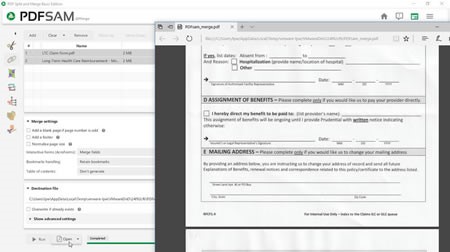
PDFsam Basic.
Like CutePDF, the basic version of PDFsam is geared toward deleting, merging, and reordering specific pages in a PDF file. There are paid versions but the free basic version should suffice if you just need to work with the pages in a PDF. After you install the basic program, fire it up and click on the command you want to run – Merge, Split, Rotate, Extract, etc.
Drag and drop the PDF file or files you want to edit. Click on Run to execute the command. Then click on Open to view the modified file.
Microsoft Word.
Finally, you can use Microsoft Word to convert a PDF file into Word format. You then edit the file in Word. When done, resave as a PDF.
The major downside is that after conversion into Word format, the PDF file won’t look exactly like the original, especially if it contained images and other non-text elements. But if you can live with that limitation, then this is a viable way to edit a PDF.
To do this, launch Word. Open the PDF you want to edit. Make your changes by adding or deleting text, rearranging pages, or tweaking other content. When you’re finished, click on File and then Save As. Change the format to PDF and then click on the Save button.
After you save the file, it automatically opens in Adobe Reader so you can view the final product.
|
||||||||||||||||||||||||||||||||||||||||||
|
A young man, who was also an avid golfer, found himself with a few hours to spare one afternoon. He figured that if he hurried and played very fast, he could get in 9 holes before he had to head home. Just as he was about to tee off, an old gentleman shuffled onto the tee and asked if he could accompany the young man as he was golfing alone. Not being able to say no, he allowed the old man to join him.
To his surprise, the old man played fairly quickly. He didn't hit the ball far, but plodded along consistently and didn't waste much time. Finally, they reached the 9th fairway and the young man found himself with a tough shot. There was a large pine tree right in front of his ball and directly between his ball and the green. After several minutes of debating how to hit the shot, the old man finally said, "You know, when I was your age, I'd hit the ball right over that tree."
With that challenge placed before him, the youngster swung hard, hit the ball up, right smack into the top of the tree trunk and it thudded back on the ground not a foot from where it had originally laid.
The old man offered one more comment, "Of course, when I was your age, that pine tree was only 3 feet tall."
|
||||||||||||||||||||||||||||||||||||||||||
|
|
||||||||||||||||||||||||||||||||||||||||||
|
|
||||||||||||||||||||||||||||||||||||||||||
|
|
||||||||||||||||||||||||||||||||||||||||||
|
|
||||||||||||||||||||||||||||||||||||||||||
|
|


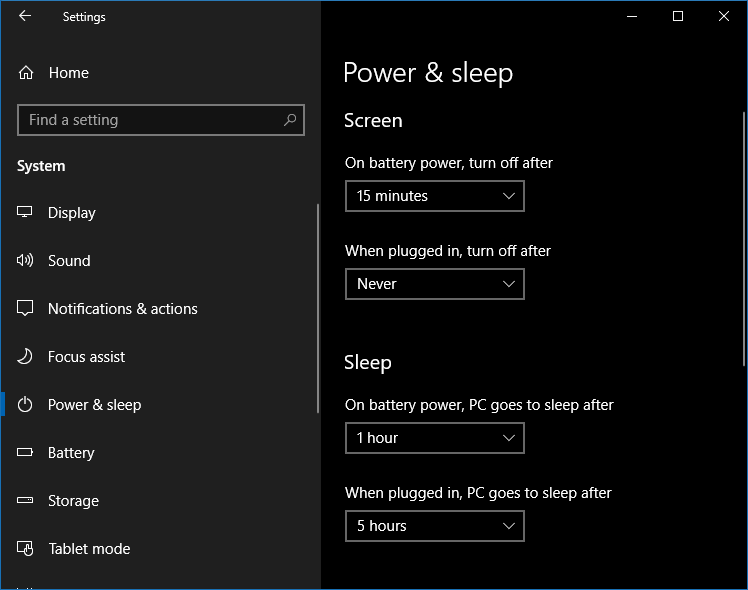 environmental,
more costly and less secure (a computer that’s turned off cannot be hacked),
but there is a middle way – if you go to the Start button > Settings >
System > Power & Sleep (may be slightly different with some systems) you
will see a screen like the one at left where you can configure the PC to go
to sleep after maybe 3, 4 or 5 hours. It can be configured to go to sleep
sooner than this, but that might not be very helpful if Windows is trying to
do a major update. So when you’ve finished, maybe turn off the screen and
walk away, knowing that after a while the machine will put itself to sleep
and then use hardly any power at all.
environmental,
more costly and less secure (a computer that’s turned off cannot be hacked),
but there is a middle way – if you go to the Start button > Settings >
System > Power & Sleep (may be slightly different with some systems) you
will see a screen like the one at left where you can configure the PC to go
to sleep after maybe 3, 4 or 5 hours. It can be configured to go to sleep
sooner than this, but that might not be very helpful if Windows is trying to
do a major update. So when you’ve finished, maybe turn off the screen and
walk away, knowing that after a while the machine will put itself to sleep
and then use hardly any power at all. 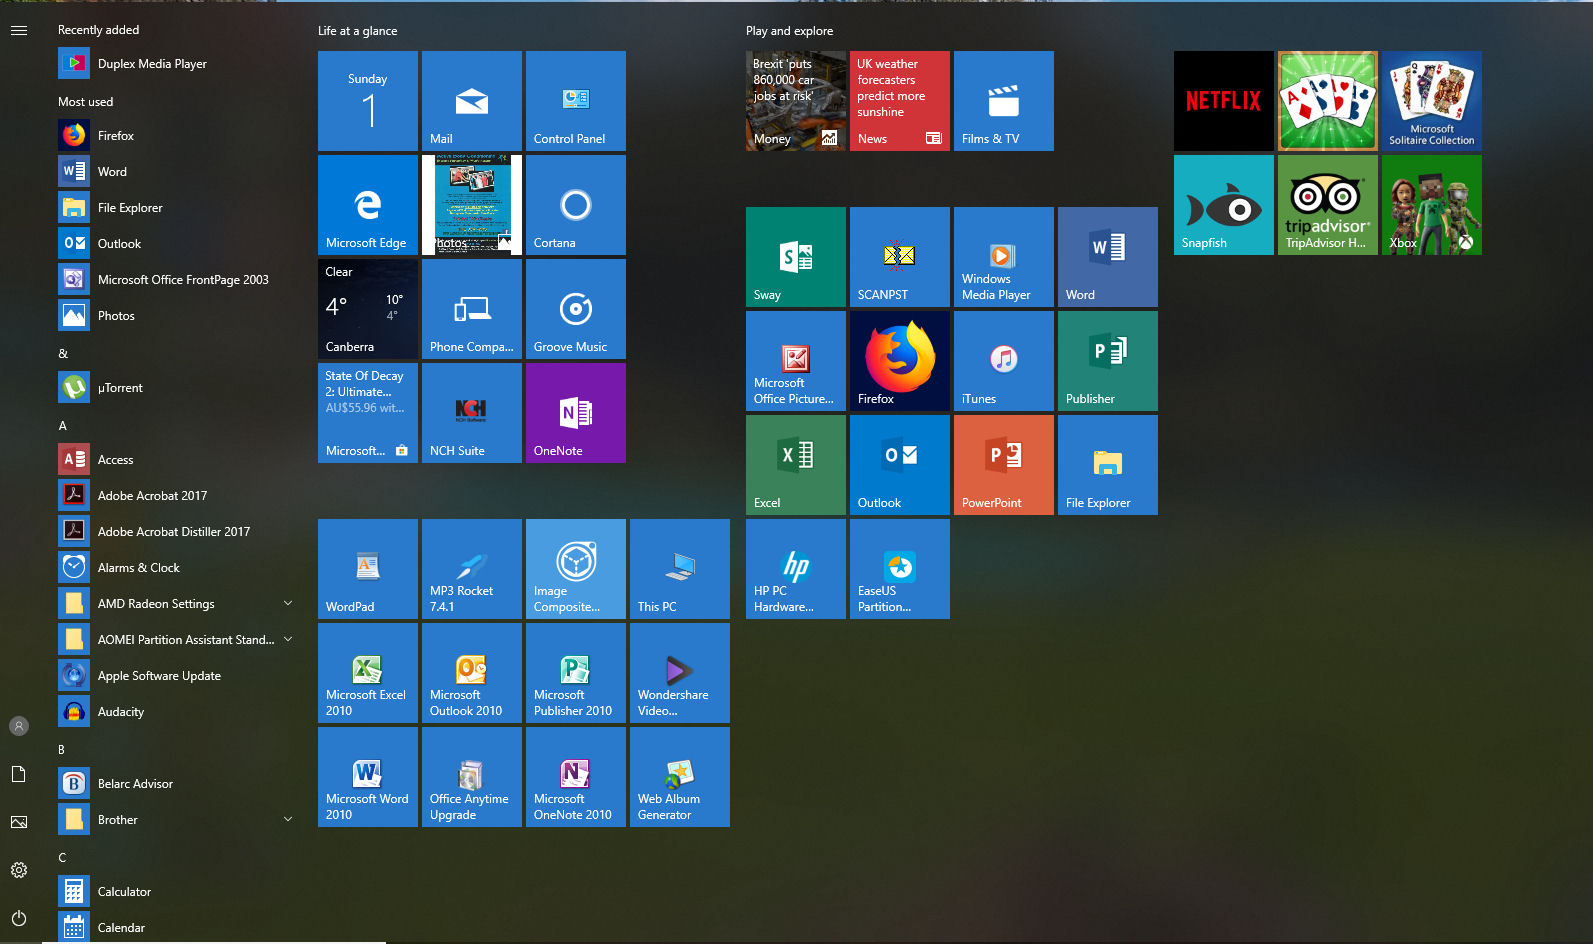


 one helpful example, you can add text directly to fields in the PDF so you
don’t have to print the file, write your responses on the pages with a pen,
and then scan them.
one helpful example, you can add text directly to fields in the PDF so you
don’t have to print the file, write your responses on the pages with a pen,
and then scan them.