|
|
||||||||||
|
||||||||||
|
Privacy Policy | Editorial Policy | Profit Policy | Join the Association | List of Members | Contact us | Index | Links |
||||||||||
|
Back Go to page: 1 2 3 4 5 6 7 8 9 10 11 12 13 14 15 16 17 18 19 20 Forward
|
||||||||||
|
|
||||||||||
|
Contents.
Qld Air Museum Open Cockpit weekend.
|
||||||||||
|
|
||||||||||
|
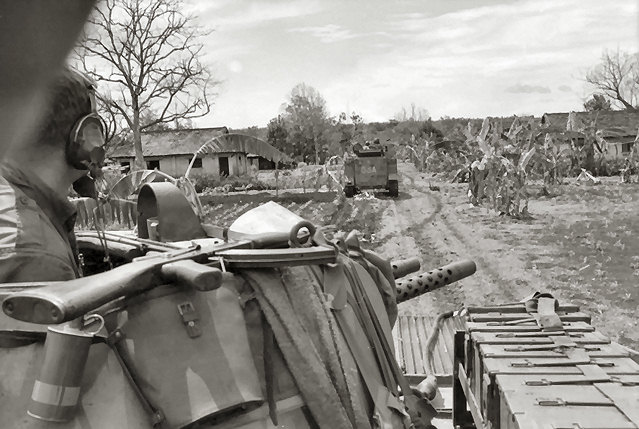
The Battle of Binh Ba (6–8 June 1969), also known as Operation Hammer, was a battle during the Vietnam War. The action occurred when Australian Army troops from the 5th Battalion, Royal Australian Regiment (5 RAR) fought a combined communist force of North Vietnamese Army and Viet Cong, including a company from the 33 NVA Regiment and elements of the Viet Cong D440 Provincial Mobile Battalion, in the village of Binh Ba, 5 kilometres north of Nui Dat.
The battle was unusual in Australian combat experience in Vietnam as it involved fierce close-quarter house-to-house fighting, although the majority of enemy killed was through heavy artillery and air-bombardment. In response to communist attempts to capture Binh Ba the Australians assaulted the village with infantry, armour and helicopter gunships, routing the Viet Cong and largely destroying the village itself. Such battles were not the norm in Phuoc Tuy, however, and the heavy losses suffered by the communists forced them to temporarily leave the province.
Although the Australians did encounter communist Main Force units in the years to come, the battle marked the end of such large-scale clashes and ranks as one of the major Australian victories of the war.
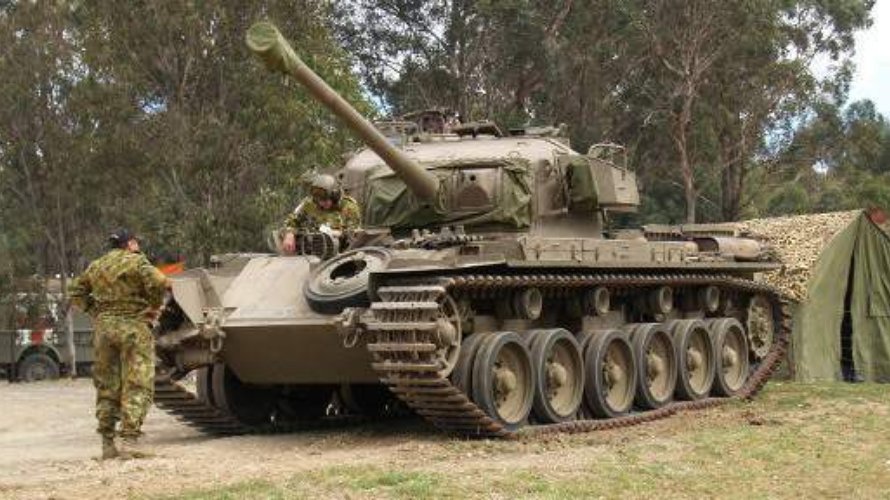
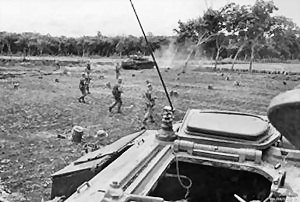
The 1 ATF Ready Reaction Force under the command of Major Murray Blake consisted of an understrength D Company 5 RAR (of just 65 men), a troop of Centurion tanks from the 1st Armoured Regiment and a troop of M-113 armoured personnel carriers from the 3rd Cavalry Regiment and subsequently reacted to the incident. In direct support was 105th Battery, Royal Australian Artillery. Meanwhile, elements of the 1st Battalion 33 NVA Regiment took up defensive positions within the village and prepared to fight to the death. By 10:30 the Australians approached Binh Ba from the south and were engaged by a volley of RPG fire from a row of houses. After evacuating much of the town's population, D Company assaulted the village from east to west following preparation from helicopter gunships of 9 Squadron RAAF. South Vietnamese Regional Force troops were deployed into blocking positions. Four tanks led the assault, with the infantry remaining mounted in the APCs following behind.
The Australians reached the edge of the village at 11:20, coming under light fire. Initially the tanks were effective for close action, however by the time the marketplace had been reached in the centre of the town concealed RPG-7s had caused external damage to two Centurions, whilst another was penetrated. Within an hour, three of the four tanks used in the initial assault were disabled through damage and crew casualties. It became clear that the initial assessments of communist strength had been inaccurate and was probably closer to a battalion than a platoon. In addition, helicopters overhead reported another large enemy force of up to 60 moving to the south and west. Blake subsequently decided swing the attack left, in order to clear the southern edge of the town before moving out to western side of Binh Ba. As the Australian armour moved through the rubber trees they clashed with a company forming up to counterattack, inflicting heavy casualties on the communists in the process.
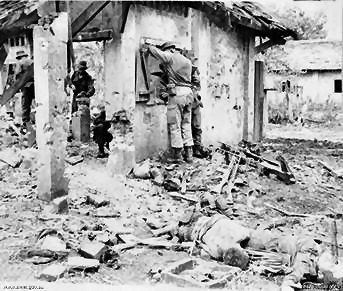
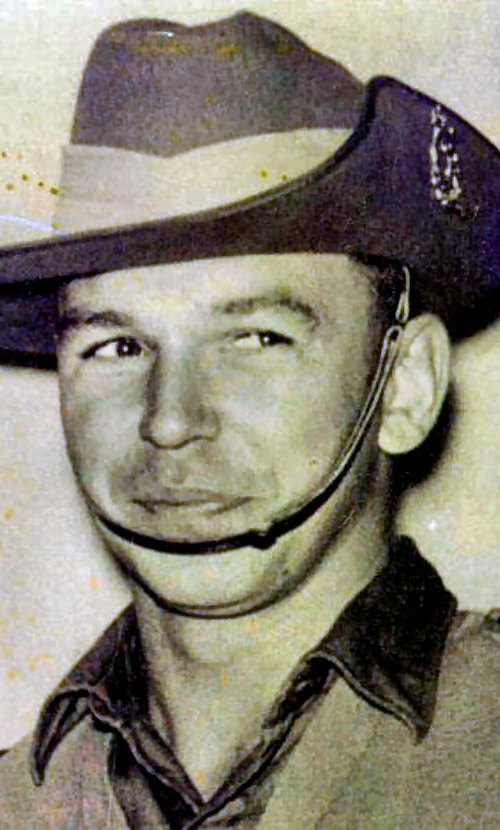
By 14:00 the Australians were bolstered by additional troops from B Company 5 RAR, under Major Rein Harring, which took up blocking positions to south and east. The Commanding Officer of 5 RAR, Lieutenant Colonel Colin Khan, now assumed command of the battle. With a fresh troop of tanks together with APC support, D Company conducted a second assault on the village, this time with the infantry leading. One tank and two M113s accompanied each platoon in close support. The lead platoon made contact with the enemy immediately and the advance was slow due to the need to clear every house. The communists occupying the houses fired on the Australians from the windows and doorways before withdrawing into tunnels as they passed. An Australian soldier, Private Wayne Teeling (left), was killed by a shot through the neck as his team approached the first line of houses. A tank fired one round of HE into the building occupied by the Viet Cong. The house exploded, and the clearing team assaulted immediately. Six dead were found in the ruins.
The fighting continued all afternoon and only ended at last light. With Binh Ba still insecure, D Company and their armoured support subsequently occupied a defensive harbour for the night, exhausted by the fighting. Overnight B Company killed two VC trying to break out to the south.
At 06:00 on the 7th June, B Company intercepted a communist company attempting to enter the town and after blocking the exit and entry routes and again supported by armour, they forced them to withdraw. On the second day the clearing of the village continued. D Company, with a platoon from B Company attached, met sporadic resistance from a number of small groups still holed up in the village. To fully clear the village, every bunker, house and any likely areas of concealment had to be searched.
|
||||||||||
|
|
||||||||||
|
Later in the morning South Vietnamese forces in the northern hamlet of Duc Trung came under attack, and B Company and the Assault Pioneer Platoon were deployed to provide assistance. Indeed, most of the action now centred on Duc Trung, with a helicopter reporting a force of up to 80 communist troops moving between the buildings. With the pioneers blocking to the south a Regional Force reaction company cleared the village, however the VC had already left. By 13:00 heavy firing again broke out in Duc Trung, with the South Vietnamese rapidly overrun by over a hundred communists. Accurate artillery fire was effective in stabilising the situation, however, and B Company with a troop of tanks swept the hamlet. During the afternoon, D Company continued to clear Binh Ba and further close-quarter fighting followed before the Australians withdrew to allow the South Vietnamese to complete the clearance. By the evening the village was secure, and B and D Companies adopted blocking positions overnight.
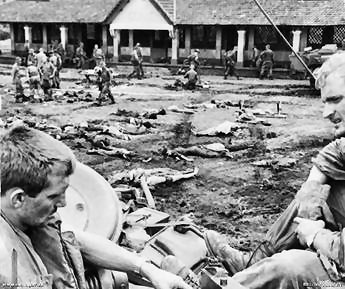
Operation Hammer concluded by 09:00 on the 8th June with one final sweep carried out that morning to ensure that Binh Ba was clear. By this time a large communist force had been defeated by the Australians, and the village practically destroyed. Indeed, Binh Ba was so badly damaged that many of the villagers whose homes were destroyed were subsequently resettled with the help of the 1st Australian Civil Affairs Unit. Despite efforts to clear the village of civilians before the battle, a large but unknown number of civilians had undoubtedly died during the fighting. This fact, coupled with the one-sided casualty count, later led to claims in the media of an Australian atrocity. One Australian had been killed and 10 wounded, while communist losses included at least 107 killed, six wounded and eight captured.
The battle was one of the major victories of the Australians in Vietnam and although they would occasionally encounter communist Main Force units in the future, it effectively marked the end of such large-scale clashes. Indeed, as a result of such heavy losses suffered at Binh Ba the North Vietnamese were temporarily forced to move out of Phuoc Tuy and into the adjoining province of Long Khanh. The Royal Australian Regiment, the 3rd Cavalry Regiment and 1st Armoured Regiment were subsequently awarded the battle honour 'Binh Ba', one of only five presented to Australian units during the war. It ranks as one of the major Australian victories of the war.
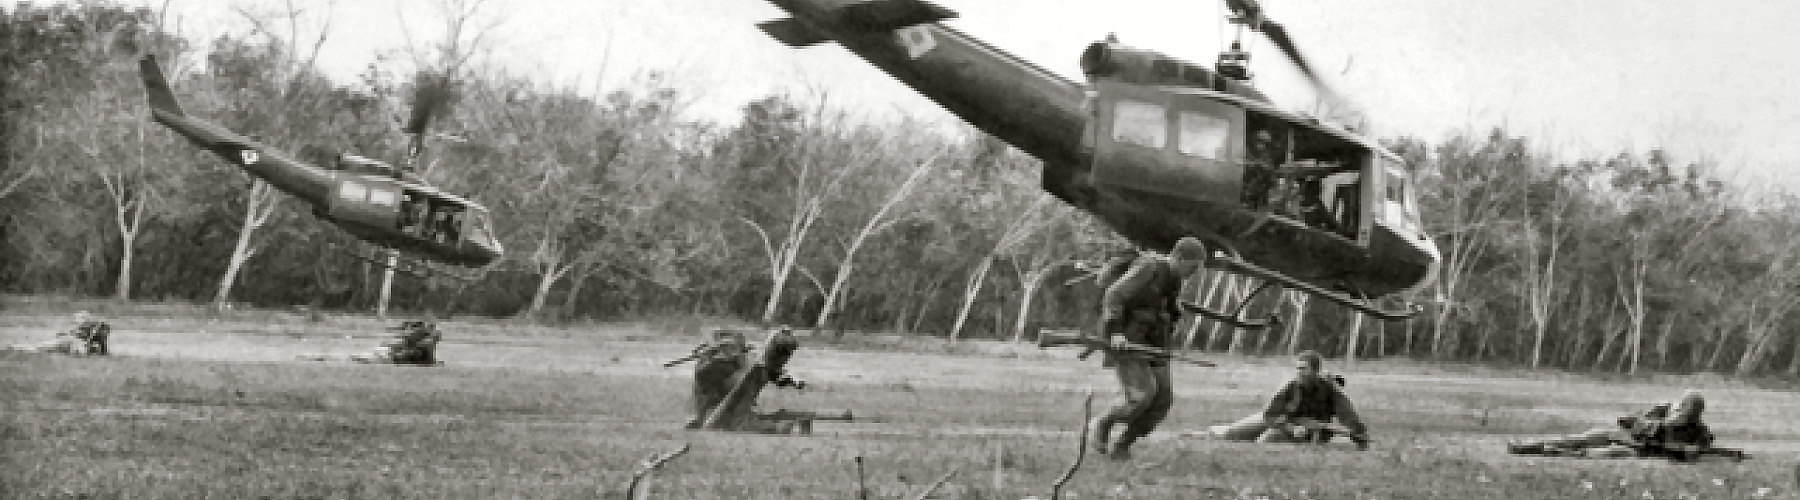
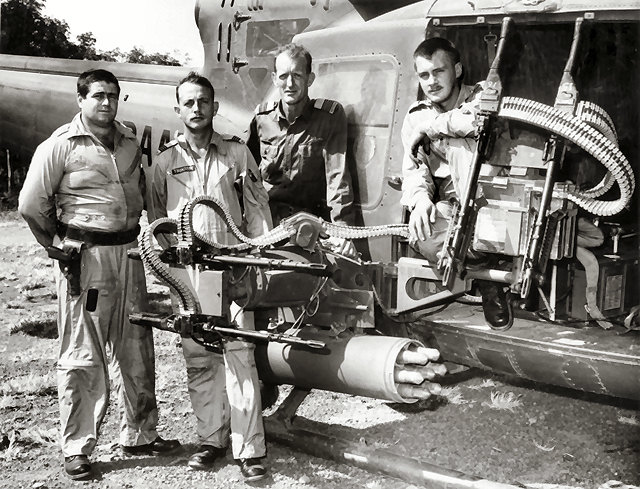
Prompt action by two 9SQN Bushranger gunships during the Battle saved the lives of a Centurion crew when their tank was disabled by an RPG-7. National serviceman David Hay said the tank took minor damage from the first hit and when a second RPG-7 struck and penetrated 22B’s turret, it left him temporarily blinded by shrapnel. ‘The tank was immediately silenced, the electrical connections to internal turret guns were severed, the turret crew all wounded by shrap nel and, apart from the crew commander’s .30 calibre machine gun, the tank was undefended,” he said. “If ever an element of luck was needed, this was the time, but luck did come and it came from above.
|
||||||||||
|
|
||||||||||
|
Two Iroquois Bushranger gun-ships from 9SQN, with not a second to spare, brought their miniguns to bear and eliminated the threat. “The plight of the two tanks would have been catastrophic had it not been for the strike by the RAAF Bushranqer helicopter light fire team of the buildings and ducking under the tanks’ guns. “Our next pass was live, mini guns, rockets and four M60 machine guns and Bushranger 72 did the same. “We saw the disabled tank and the VG who were about to fire on it, but after a quick burst from us, they didn’t. After the start of the battle, Bushranger 73 was called forward to work with Bushranger 71 and 72 as a heavy fire team (HFT). David Moles, a 9 Sqn crewman, said Bushranger 71 got a message from the FAC, who told them a VC had fired an RPG-7 at them and it missed by just yards. “We continued to do firing passes, and on our last pass before we went back to the Dat to rearm and refuel, I noticed we were lower than the previous passes” he said. |
||||||||||
|
“As our last rocket was fired, a piece of roof tile flew up and went through the front window of Bushranger 71, between the two drivers and hitting the transmission wall at the rear. I retrieved it and showed it to the drivers; co-pilot Rob Treloar was not impressed, nor was I”
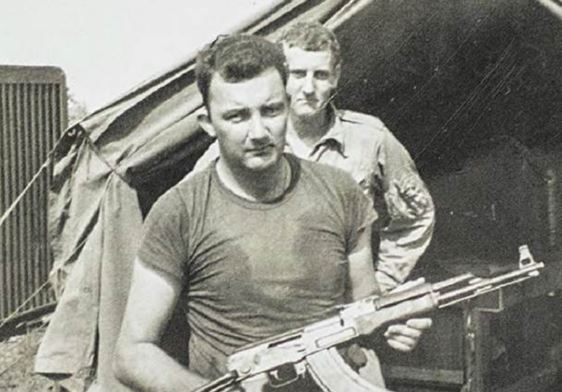
David Moles with Allan Lamb at rear, with the AK-47.
When they first arrived over Binh Ba, Alan Adamson asked the ground controller if all locals were evacuated from the buildings and was told “yes”. “Al said he was going to do a dry pass down the village and have a look in the windows, which we did. I could see the enemy running out and I believed without air support the battle would have been very different, with more KIAs instead of only one. From memory, the Heavy Fire Team (HFT) fired a full load, that is, each aircraft 10,000 7.62 minigun rounds, 4000 door gun M60 7.62 rounds, 14 2.75 HE rockets, as well as what we fired after refuelling and rearming,” he said. “A few days later when we were at the rearm point at the Dat, a couple of diggers came up and presented Al Lamb, the gunner on Bushranger 71 and me, with an AK-47, which we thought was great. “We hung it in the airmen’s boozer”
When a clock is hungry it goes back four seconds.
Employment of Gunship Fire Teams.
A gunship or armed helicopter is a helicopter equipped with an attached weapons system which is fired by the aircraft commander or co-pilot. This is opposed to the slick which only carries defensive armament in the form of side door machine guns. The tactical unit is a minimum of two gunships forming a Light Fire Team (LFT). A Heavy Fire Team (HFT) is three gunships.
|
||||||||||
|
|
||||||||||
|
L-R: Sgt Ernest Moore (Gunny); FlLt Robert Thompson (Pilot); SqnLdr James Cox, (Pilot); LAC Edward Maxwell, (Gunny).
|
||||||||||
|
Normally in a large operation, as an LFT expends its ammunition or fuel, it has to be replaced on station by another LFT. This can present quite a problem in a hot action as an LFT can expend its full quota of ammunition in under five minutes. For a prolonged operation a request for an HFT will ensure that, with the allowance made for the staggered re-arming or re-fuelling of individual gunships, an LFT is always available to support the operation. The technical advice in regard to the employment of gunships integral to the assault helicopter company allocated to support a unit can be given when the Air Mission Commander (AM Comd) conducts his liaison visit. At this time the gunner can co-ordinate his fire planning in regard to the LFT/HFT. In the combat assault some tasks carried out by gunships are:
Escort. Escort of slicks from the PZ to LZ and return. If the aviation assets are available this should be a separate task for a separate LFT, to that detailed for pre-strikes. Having this escort LFT in addition to a pre-strike LFT provides a reserve to the AM Comd should the pre-strike LFT require support or replacement while re-arming.
Pre-strikes. A conventional sequence is at H hour-2 (H hour being when the first slick lands on the LZ) when the LFT makes a firing pass (armed reconnaissance) over the LZ. The aim is to check visually and by fire whether the area of the LZ is occupied by the Viet Cong. This also fills in the gap as the artillery lifts from its preparatory fire to blocking fire role. The LFT then makes a second pass at H hour-1, under direction of the C and C aircraft, to mark the position where the first slick will land. Marking is done by the hand-dropping of a coloured smoke canister. With the Huey Cobra gunship other marking methods, if required, must he used.
|
||||||||||
|
You are stuck with your debt if you can't budge it.
|
||||||||||
|
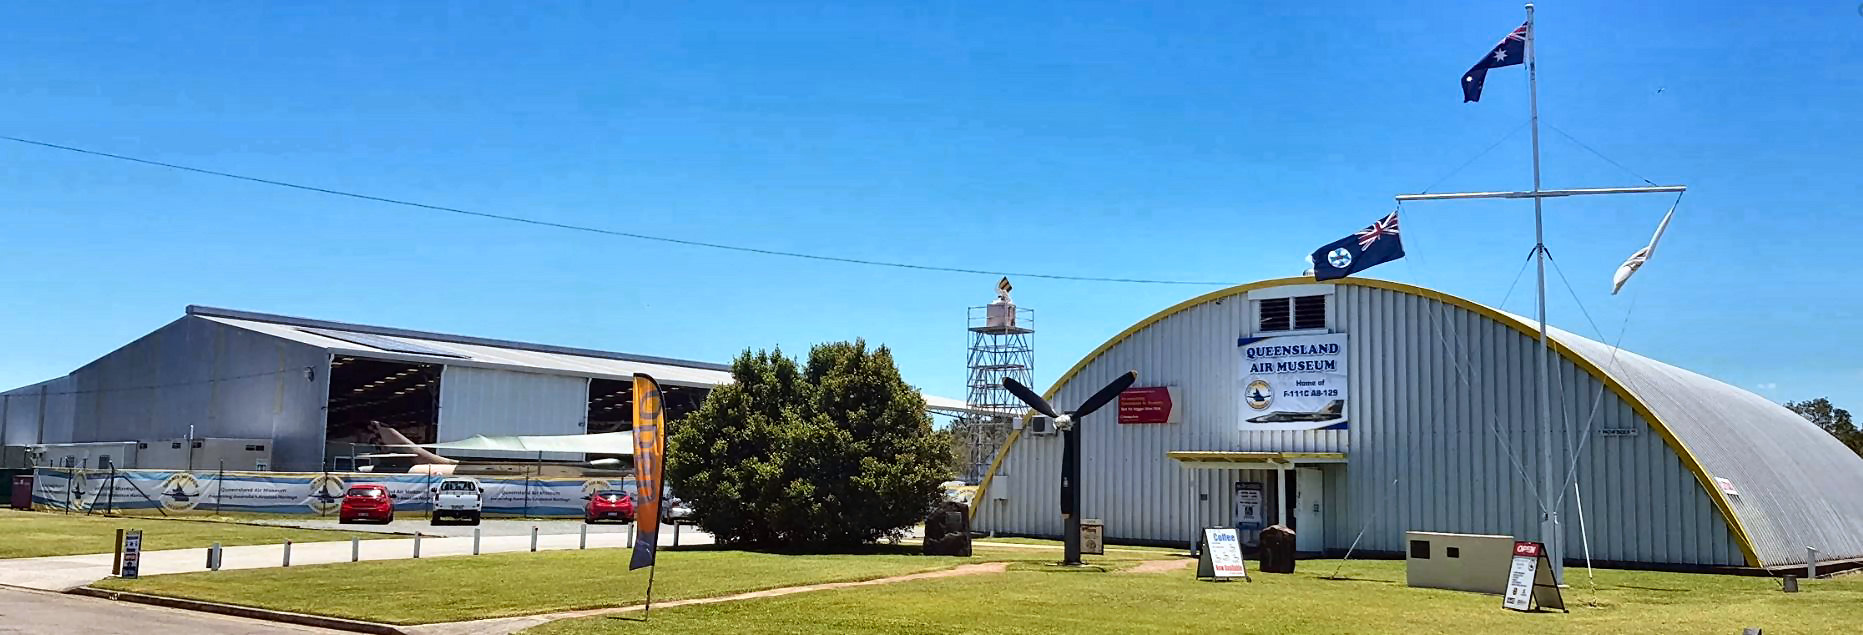
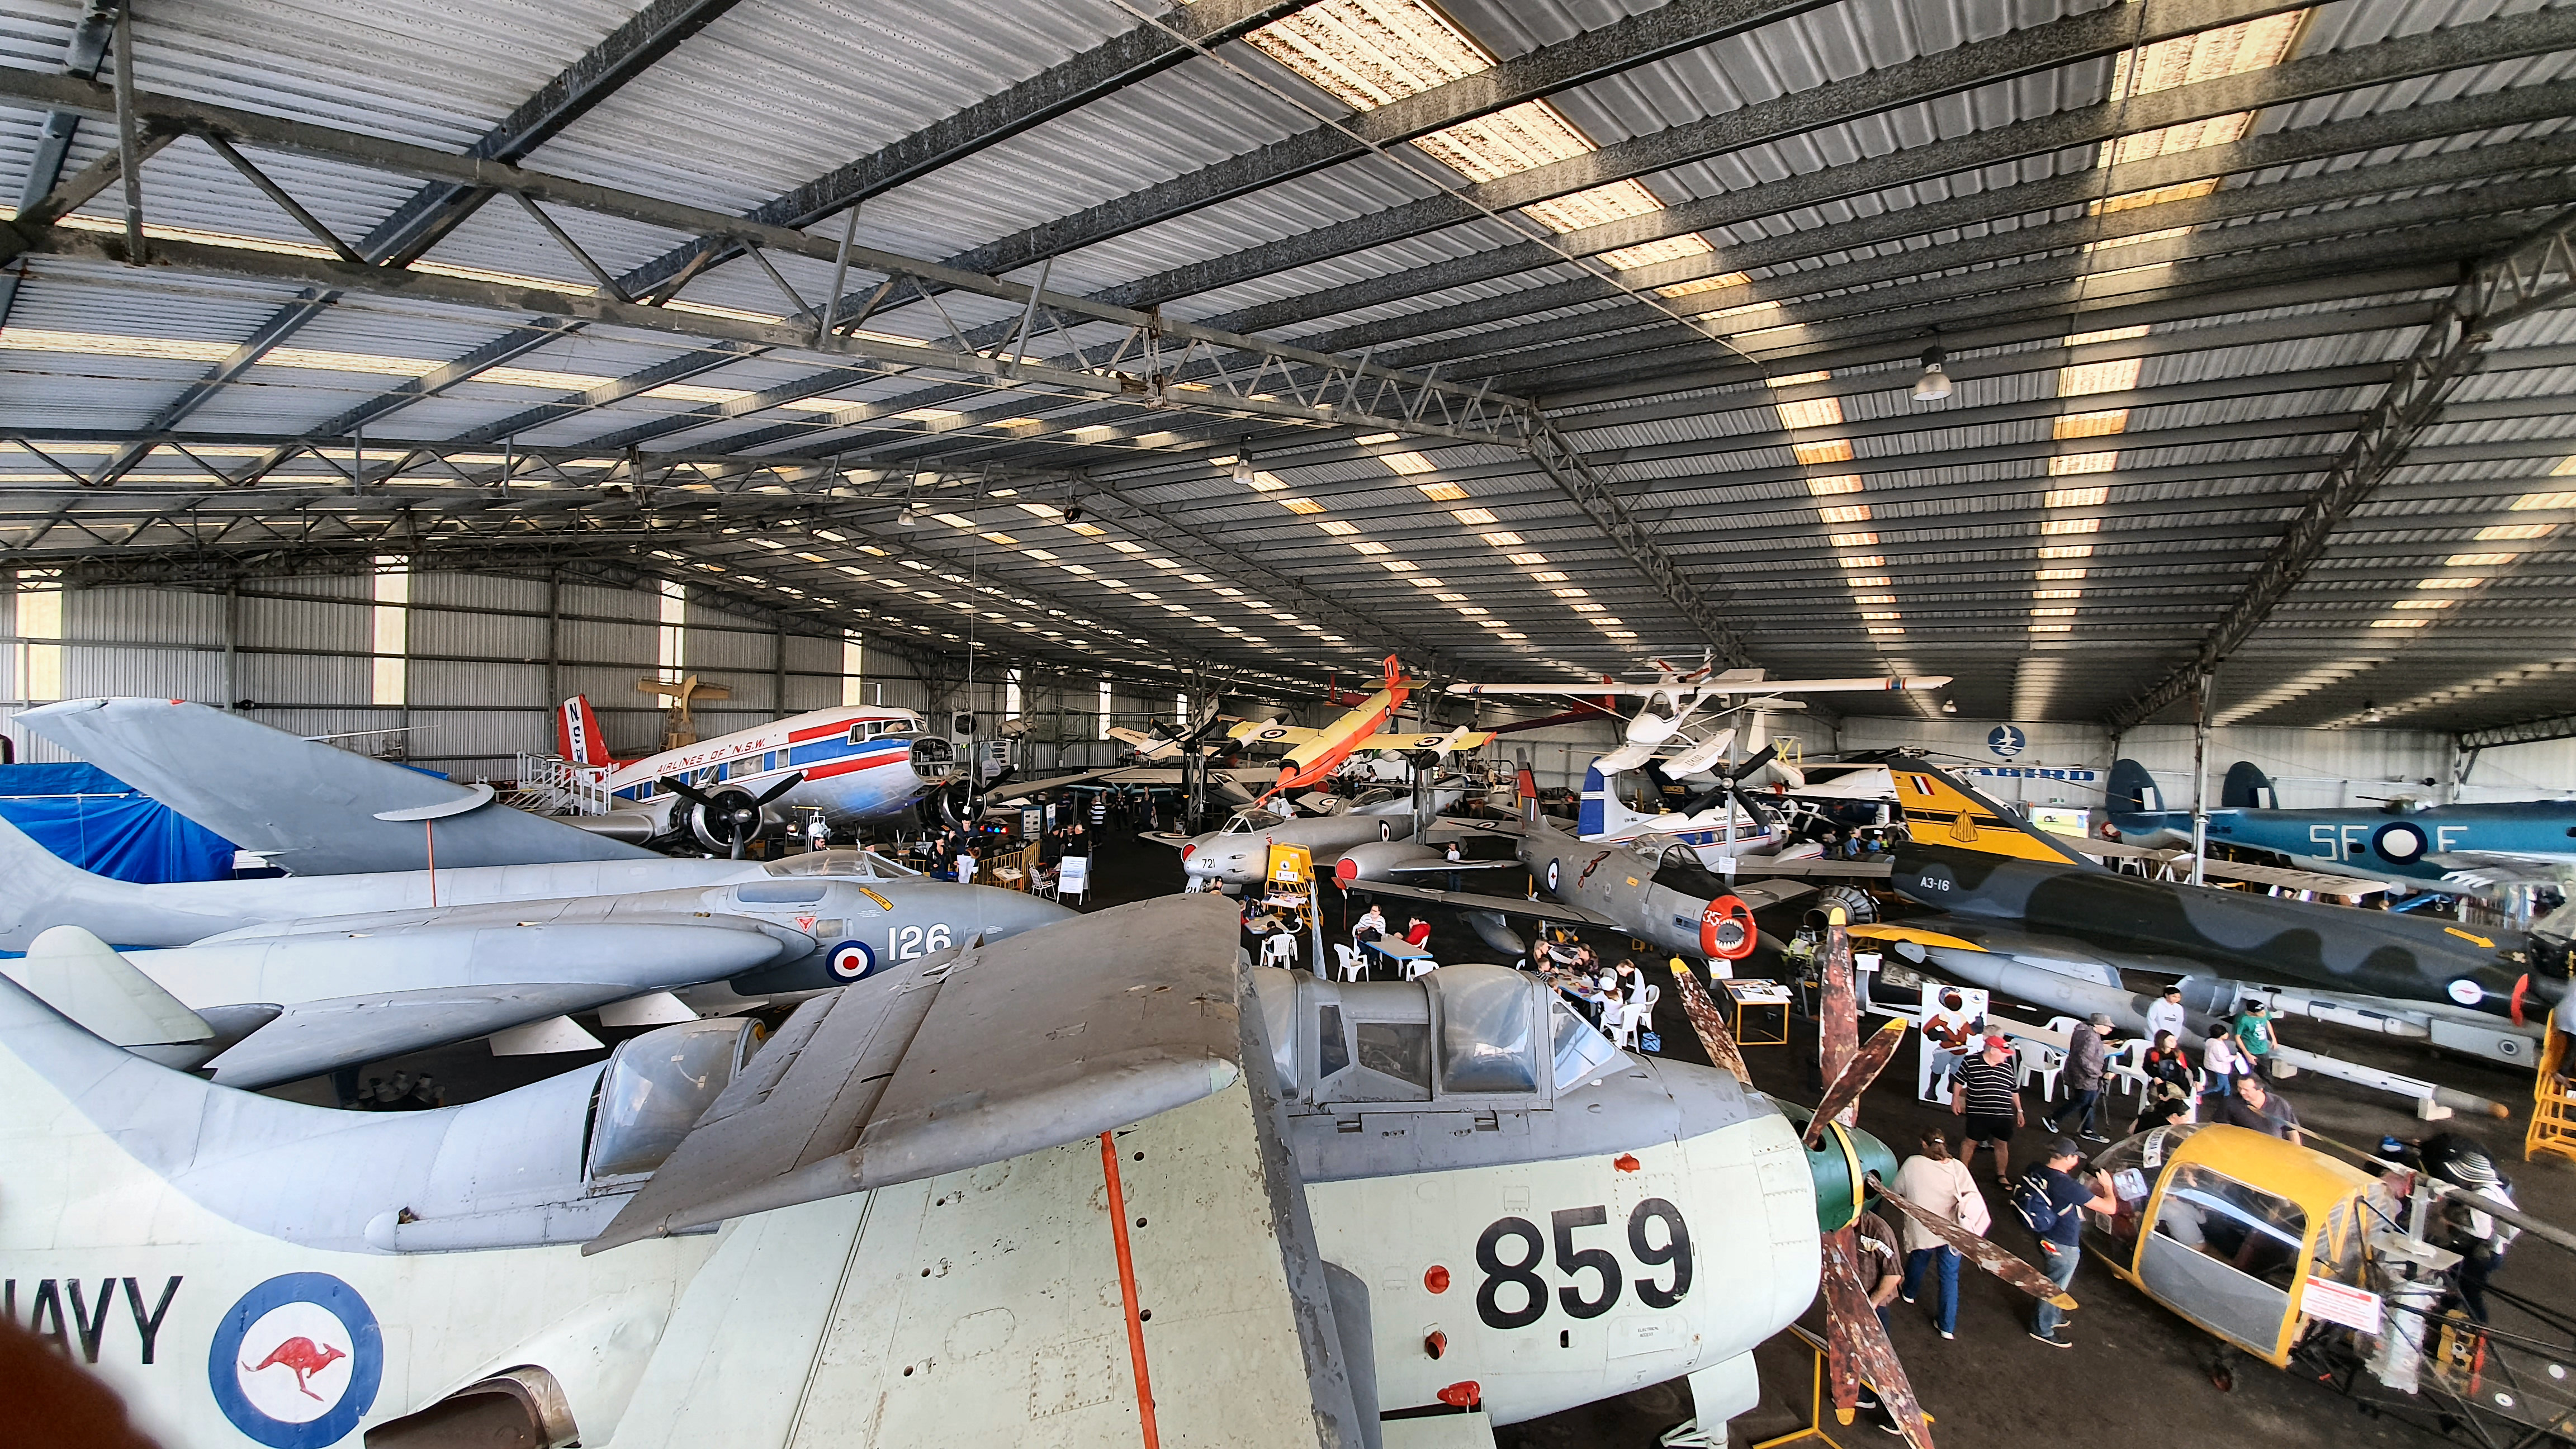
Queensland Air Museum. Caloundra.
The Queensland Air Museum (QAM) is a not-for-profit community owned aviation museum located at Caloundra Airport in Queensland. Its mission is to collect and preserve all aspects of aviation heritage with an emphasis on Australia and Queensland. The museum has the largest collection of historical aircraft in Australia and it also has a large collection of aircraft engines, equipment, artefacts, photographs and books.
|
||||||||||
|
|
||||||||||
|
Back on the 2nd June 1974 the Queensland Air Museum was inaugurated with the official unveiling of an ex-RAAF Canberra that had been purchased from a Government disposal. The aircraft was displayed at the Pioneer Valley Park, which was a museum at Kuraby in Brisbane’s southern suburbs. The park was eventually closed and the aircraft was moved to a leased site at Nudgee on the north side of Brisbane. The collection began to grow when a Meteor TT20 was donated to the museum by the British Government and a Vampire and two Sea Venoms were acquired.
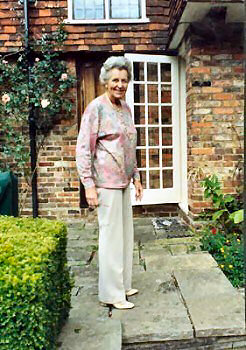
Due to the construction of the new Brisbane Airport nearby, the collection was forced to move to a temporary holding area on the airport site. Exorbitant rental costs at this location eventually lead to the museum being evicted and the resultant publicity resulted in an offer of a permanent home on the Sunshine Coast by the Landsborough Shire Council. On the 14th June 1986 the collection was relocated to a site at Caloundra Airport which had a newly built hangar. The official opening of the museum took place on the 4th April 1987 by Mrs Lyn Bennett (right), wife of the museum’s first patron, the late Air Vice-Marshal Don Bennett. Don Bennett was the Queensland born founder of the World War II Bomber Command Pathfinder Force and to honour this the road in front of the museum was named Pathfinder Drive.
Now with a permanent home the collection continued to grow and in 1989 it was bolstered by an ambitious recovery expedition to Singapore where a Sea Vixen, Meteor and Hunter were purchased from a scrap metal dealer just days before their destruction. The aircraft were disassembled and successfully shipped to Australia where they were restored and placed on display.
The two hectare museum site has been steadily developed with the construction of a second hangar being completed in July 2004 which was later extended in 2006. A library, restoration and storage facilities have also been constructed. In September 2006, Mr Allan Vial, DFC OAM OPR (Pol), become the Patron of the Queensland Air Museum, he is also Life President of the Pathfinder Force Association in Australia.
|
||||||||||
|
|
||||||||||
|
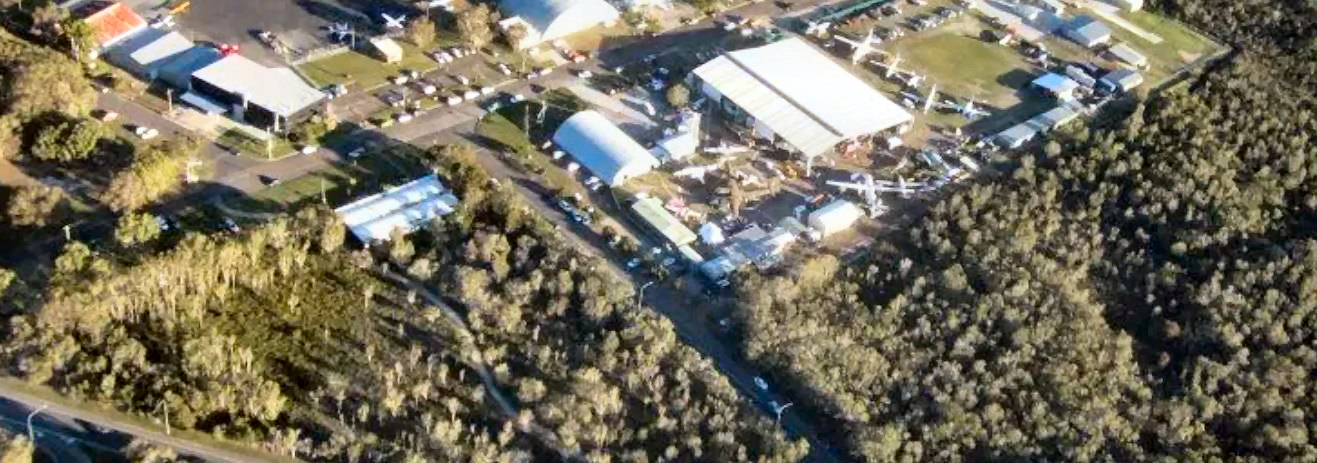
A plan to relocate Caloundra Airport placed an uncertain future on the museum for many years. But on the 2nd September 2010 the Queensland Premier Anna Bligh announced in Parliament that the airport would continue to operate on its present site and she said this would provide "certainty for the iconic air museum". The museum’s situation further improved when the Sunshine Coast Regional Council granted the museum a 30-year lease extension and on the 28th March 2013 a Caloundra Aerodrome Master Plan was adopted. The Plan recognised the museum’s tourism potential and provided for a substantial increase in the size of the museum’s site to allow for expansion.
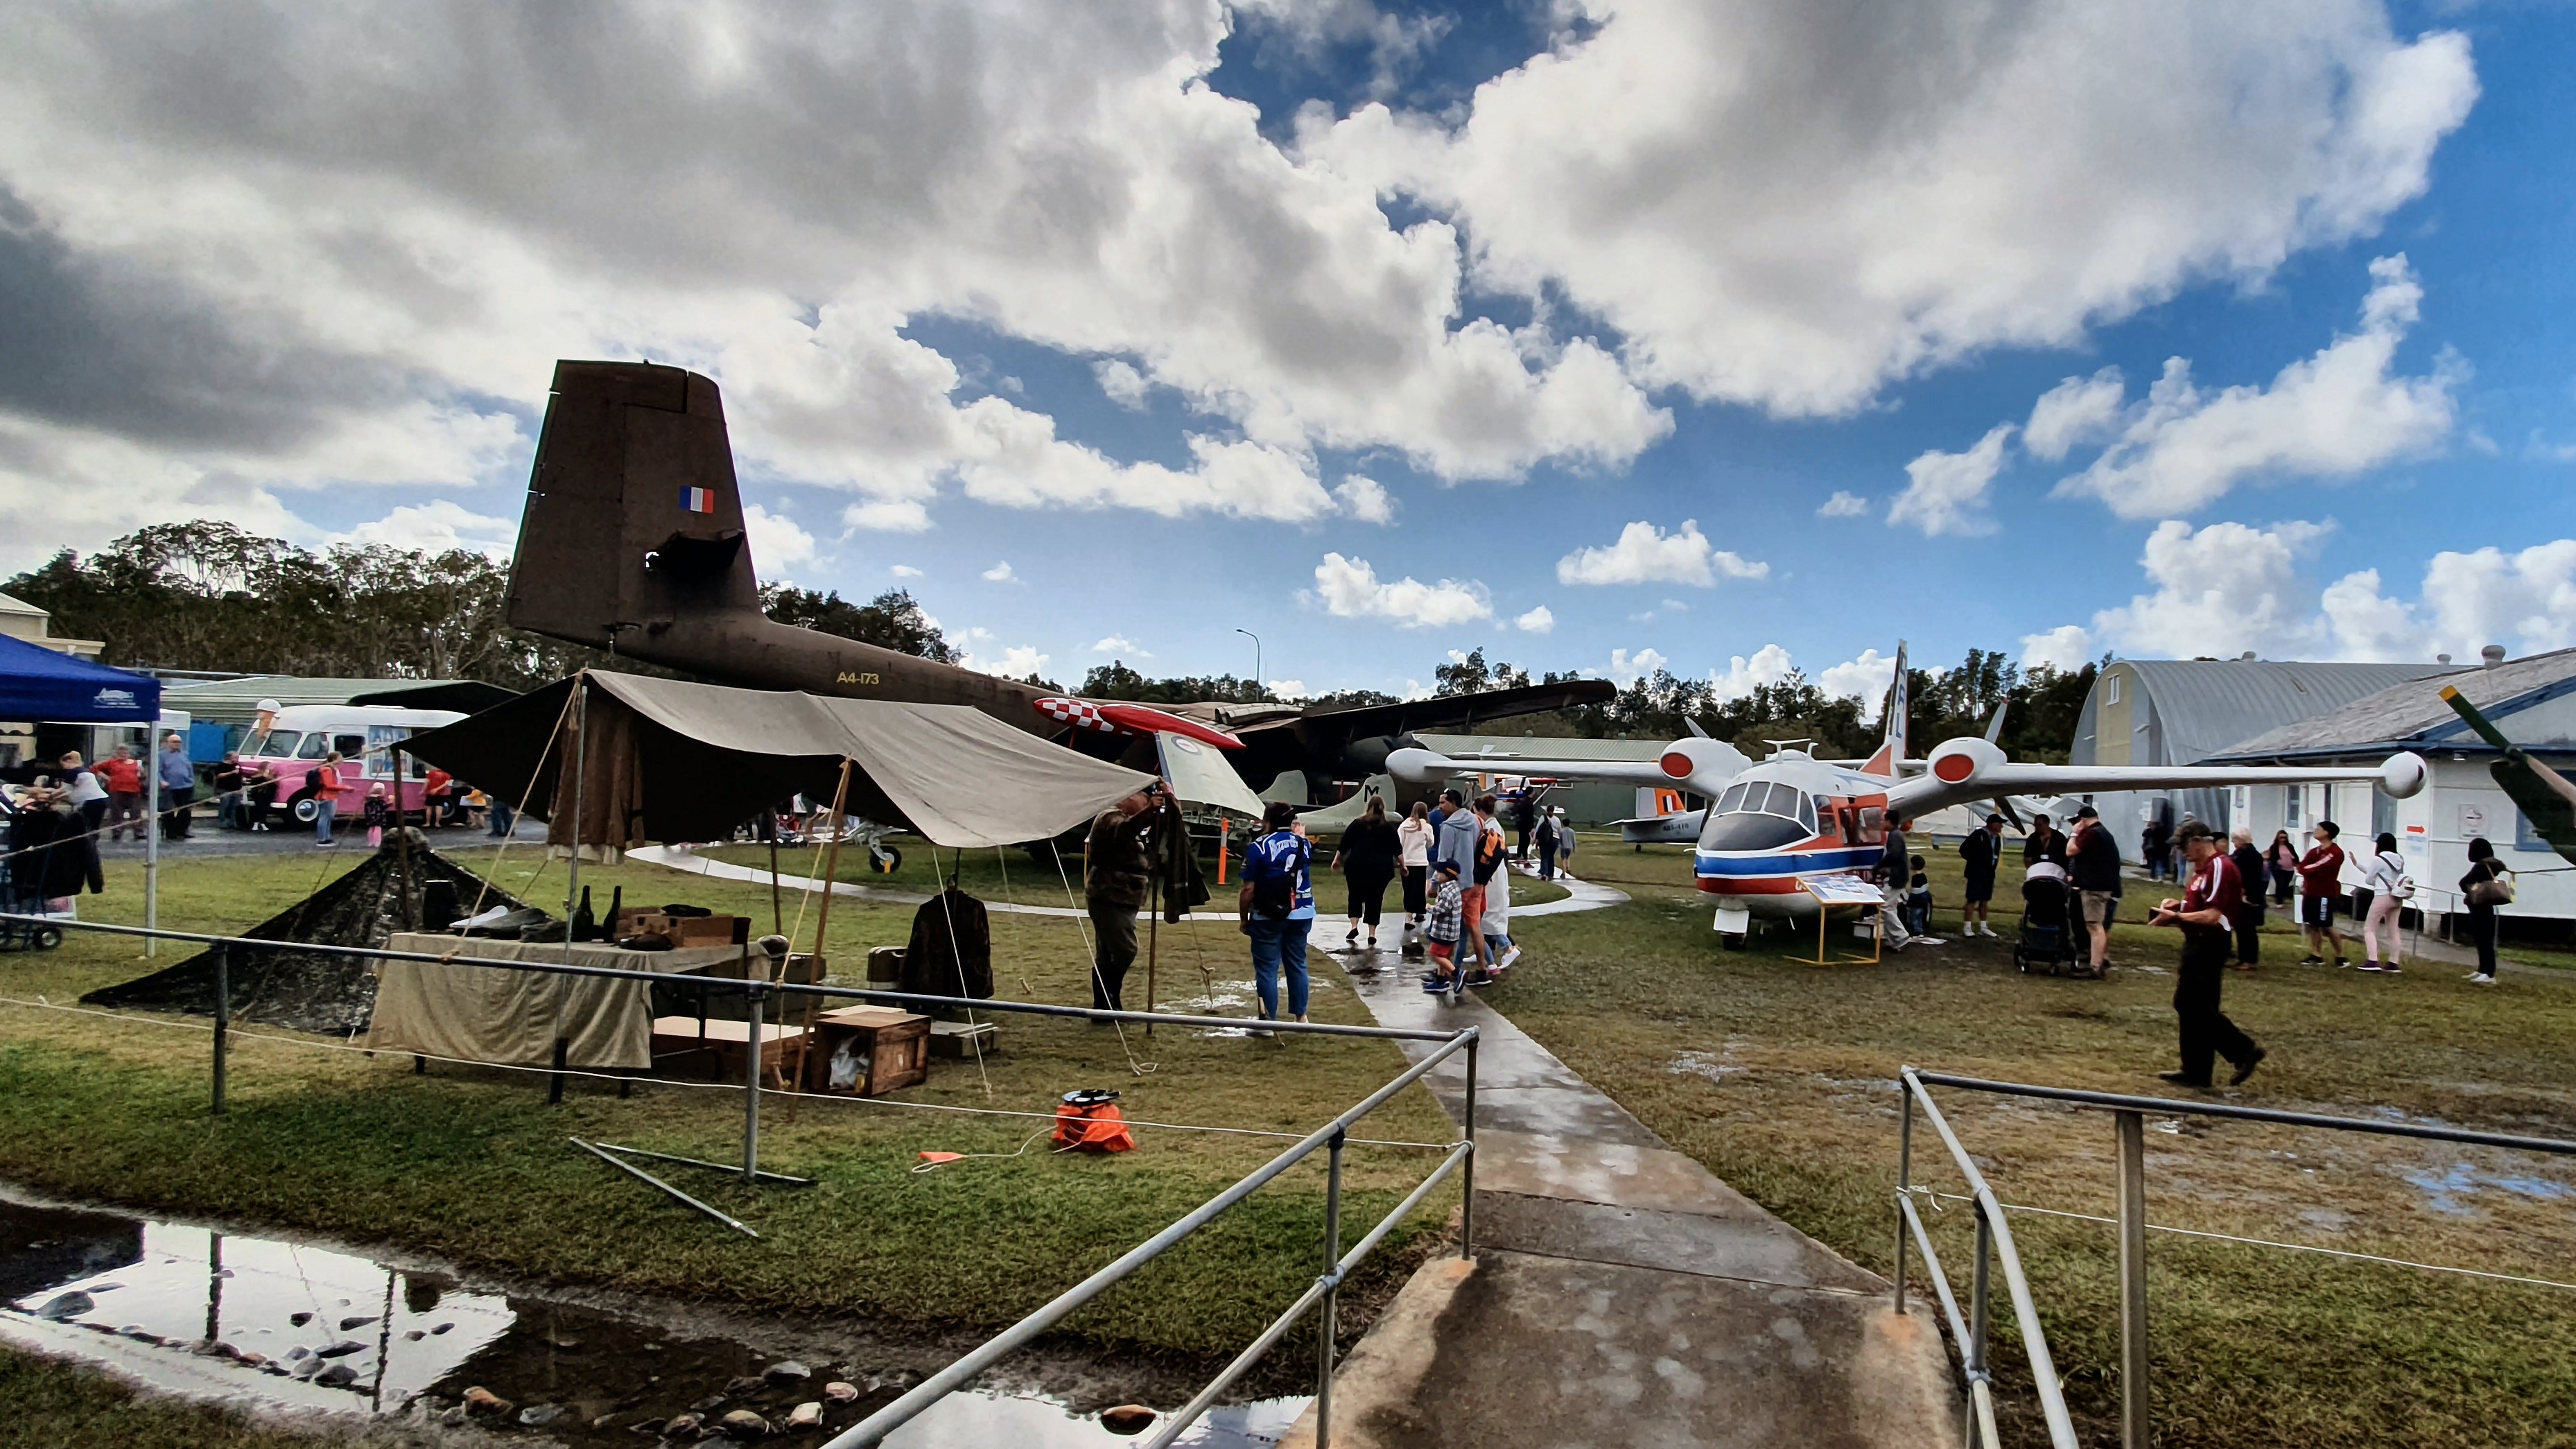
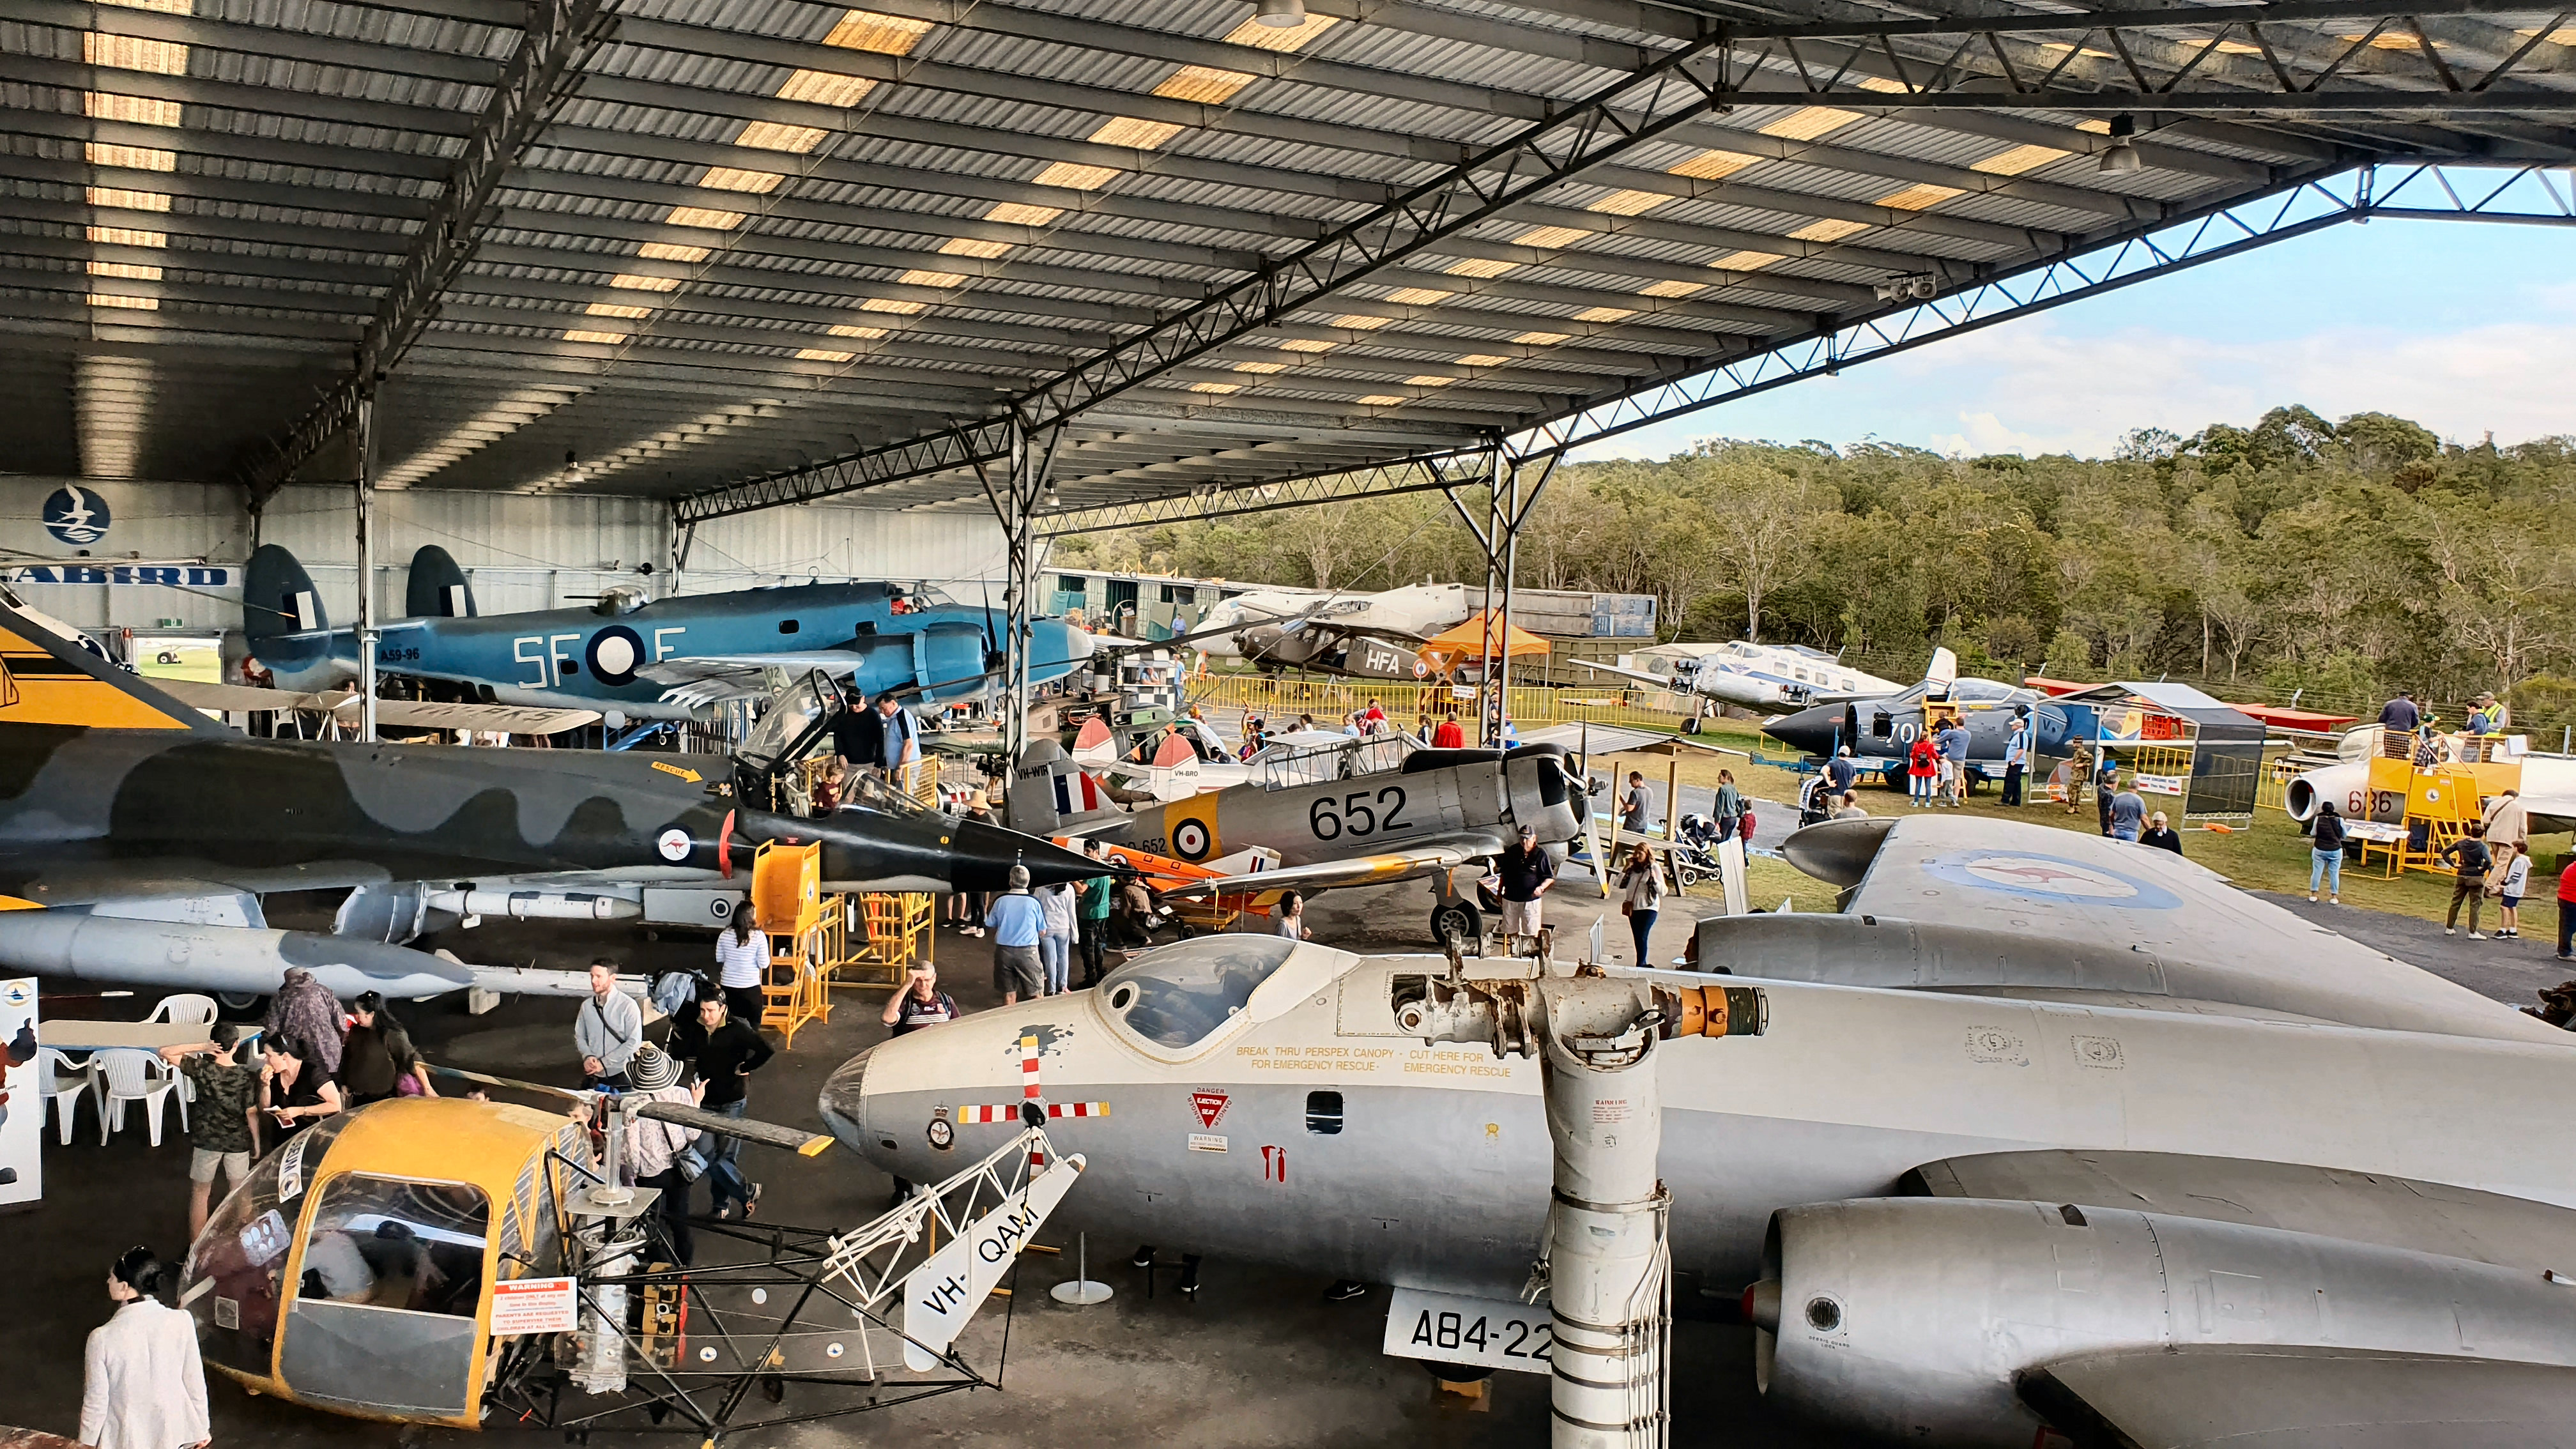
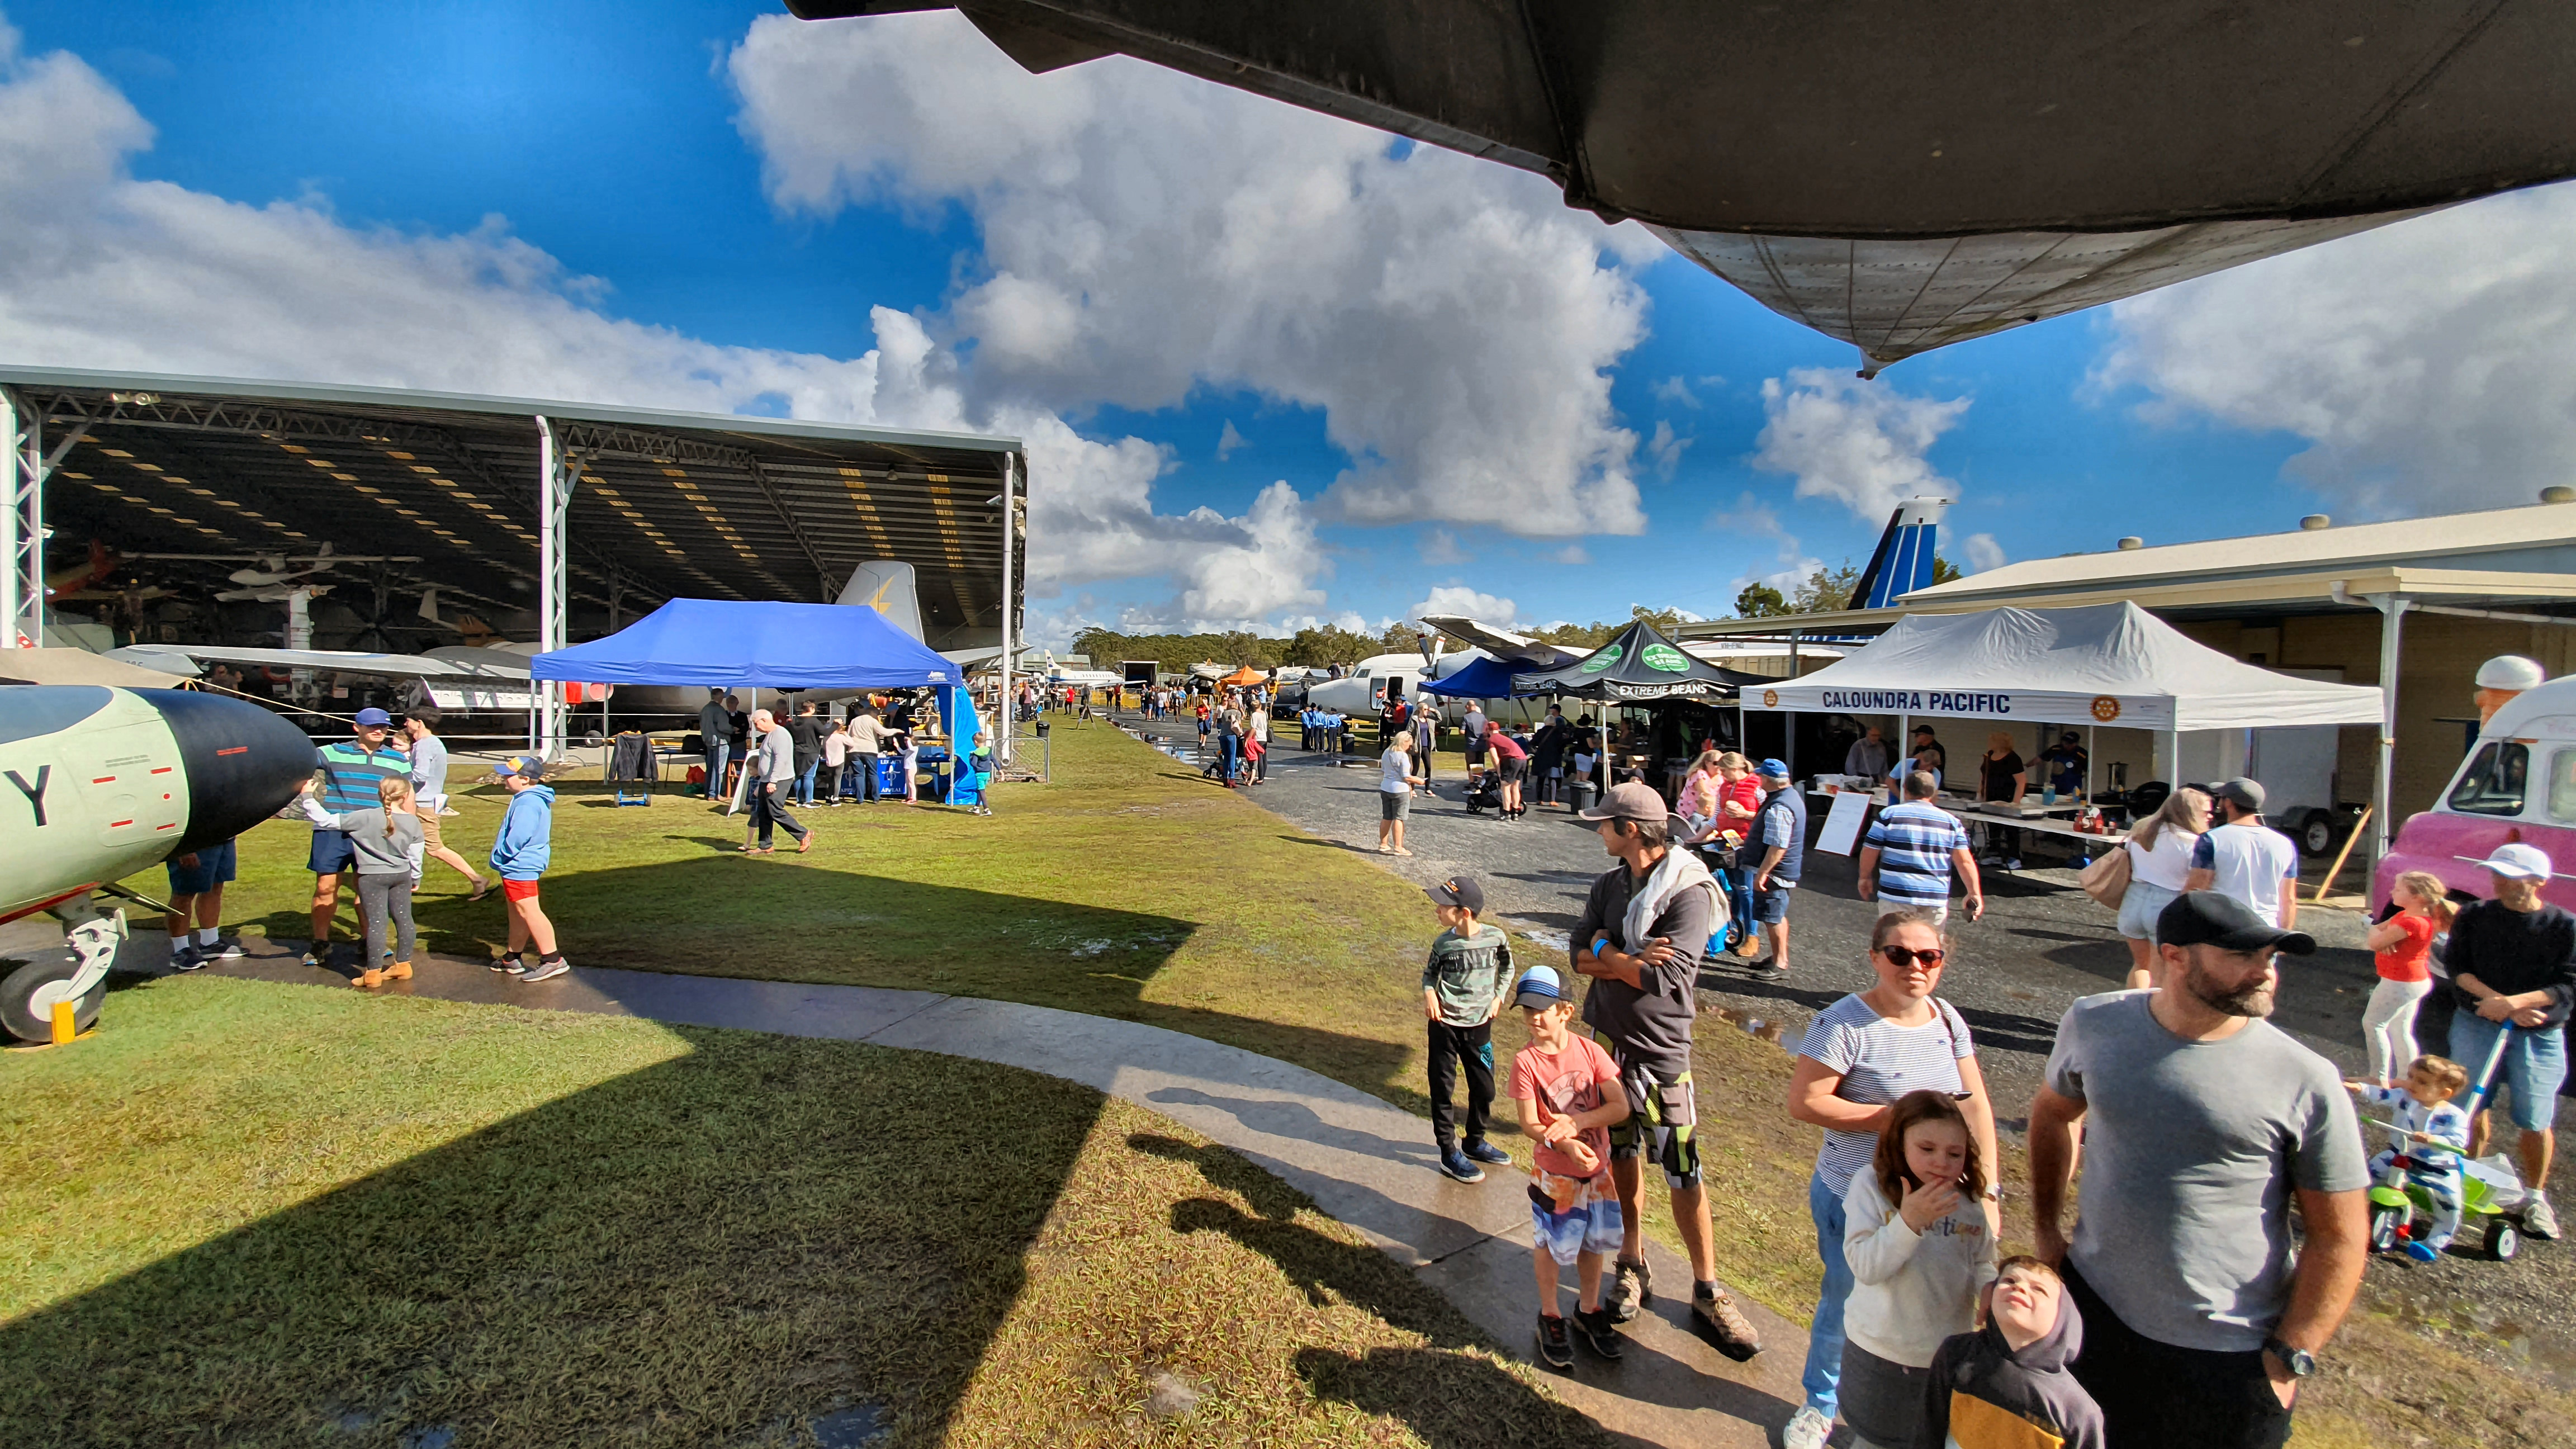
Every year, in July during school holidays, over a weekend, the Museum hosts an Open Cockpit Weekend where the public is invited to the Museum and is able to climb in, on and around all the aircraft on display. People who have flown or worked on the aircraft are asked to volunteer for one or both of the days and to act as guides and explain the ins and outs of the aircraft. The QAM opens in a carnival atmosphere with a large range of activities and entertainment. Some of the aircraft on display include an F-111, Mirage, Neptune and and Australia’s first Douglas DC-3, built in 1937 and was operated by KLM on the Amsterdam to Batavia route, a 5-day trip!
This year’s event was held over the weekend 06 – 07 July.
As well as static displays, there were several aircraft which had their engines run, always a great crowd draw.
|
||||||||||
|
|
||||||||||
|
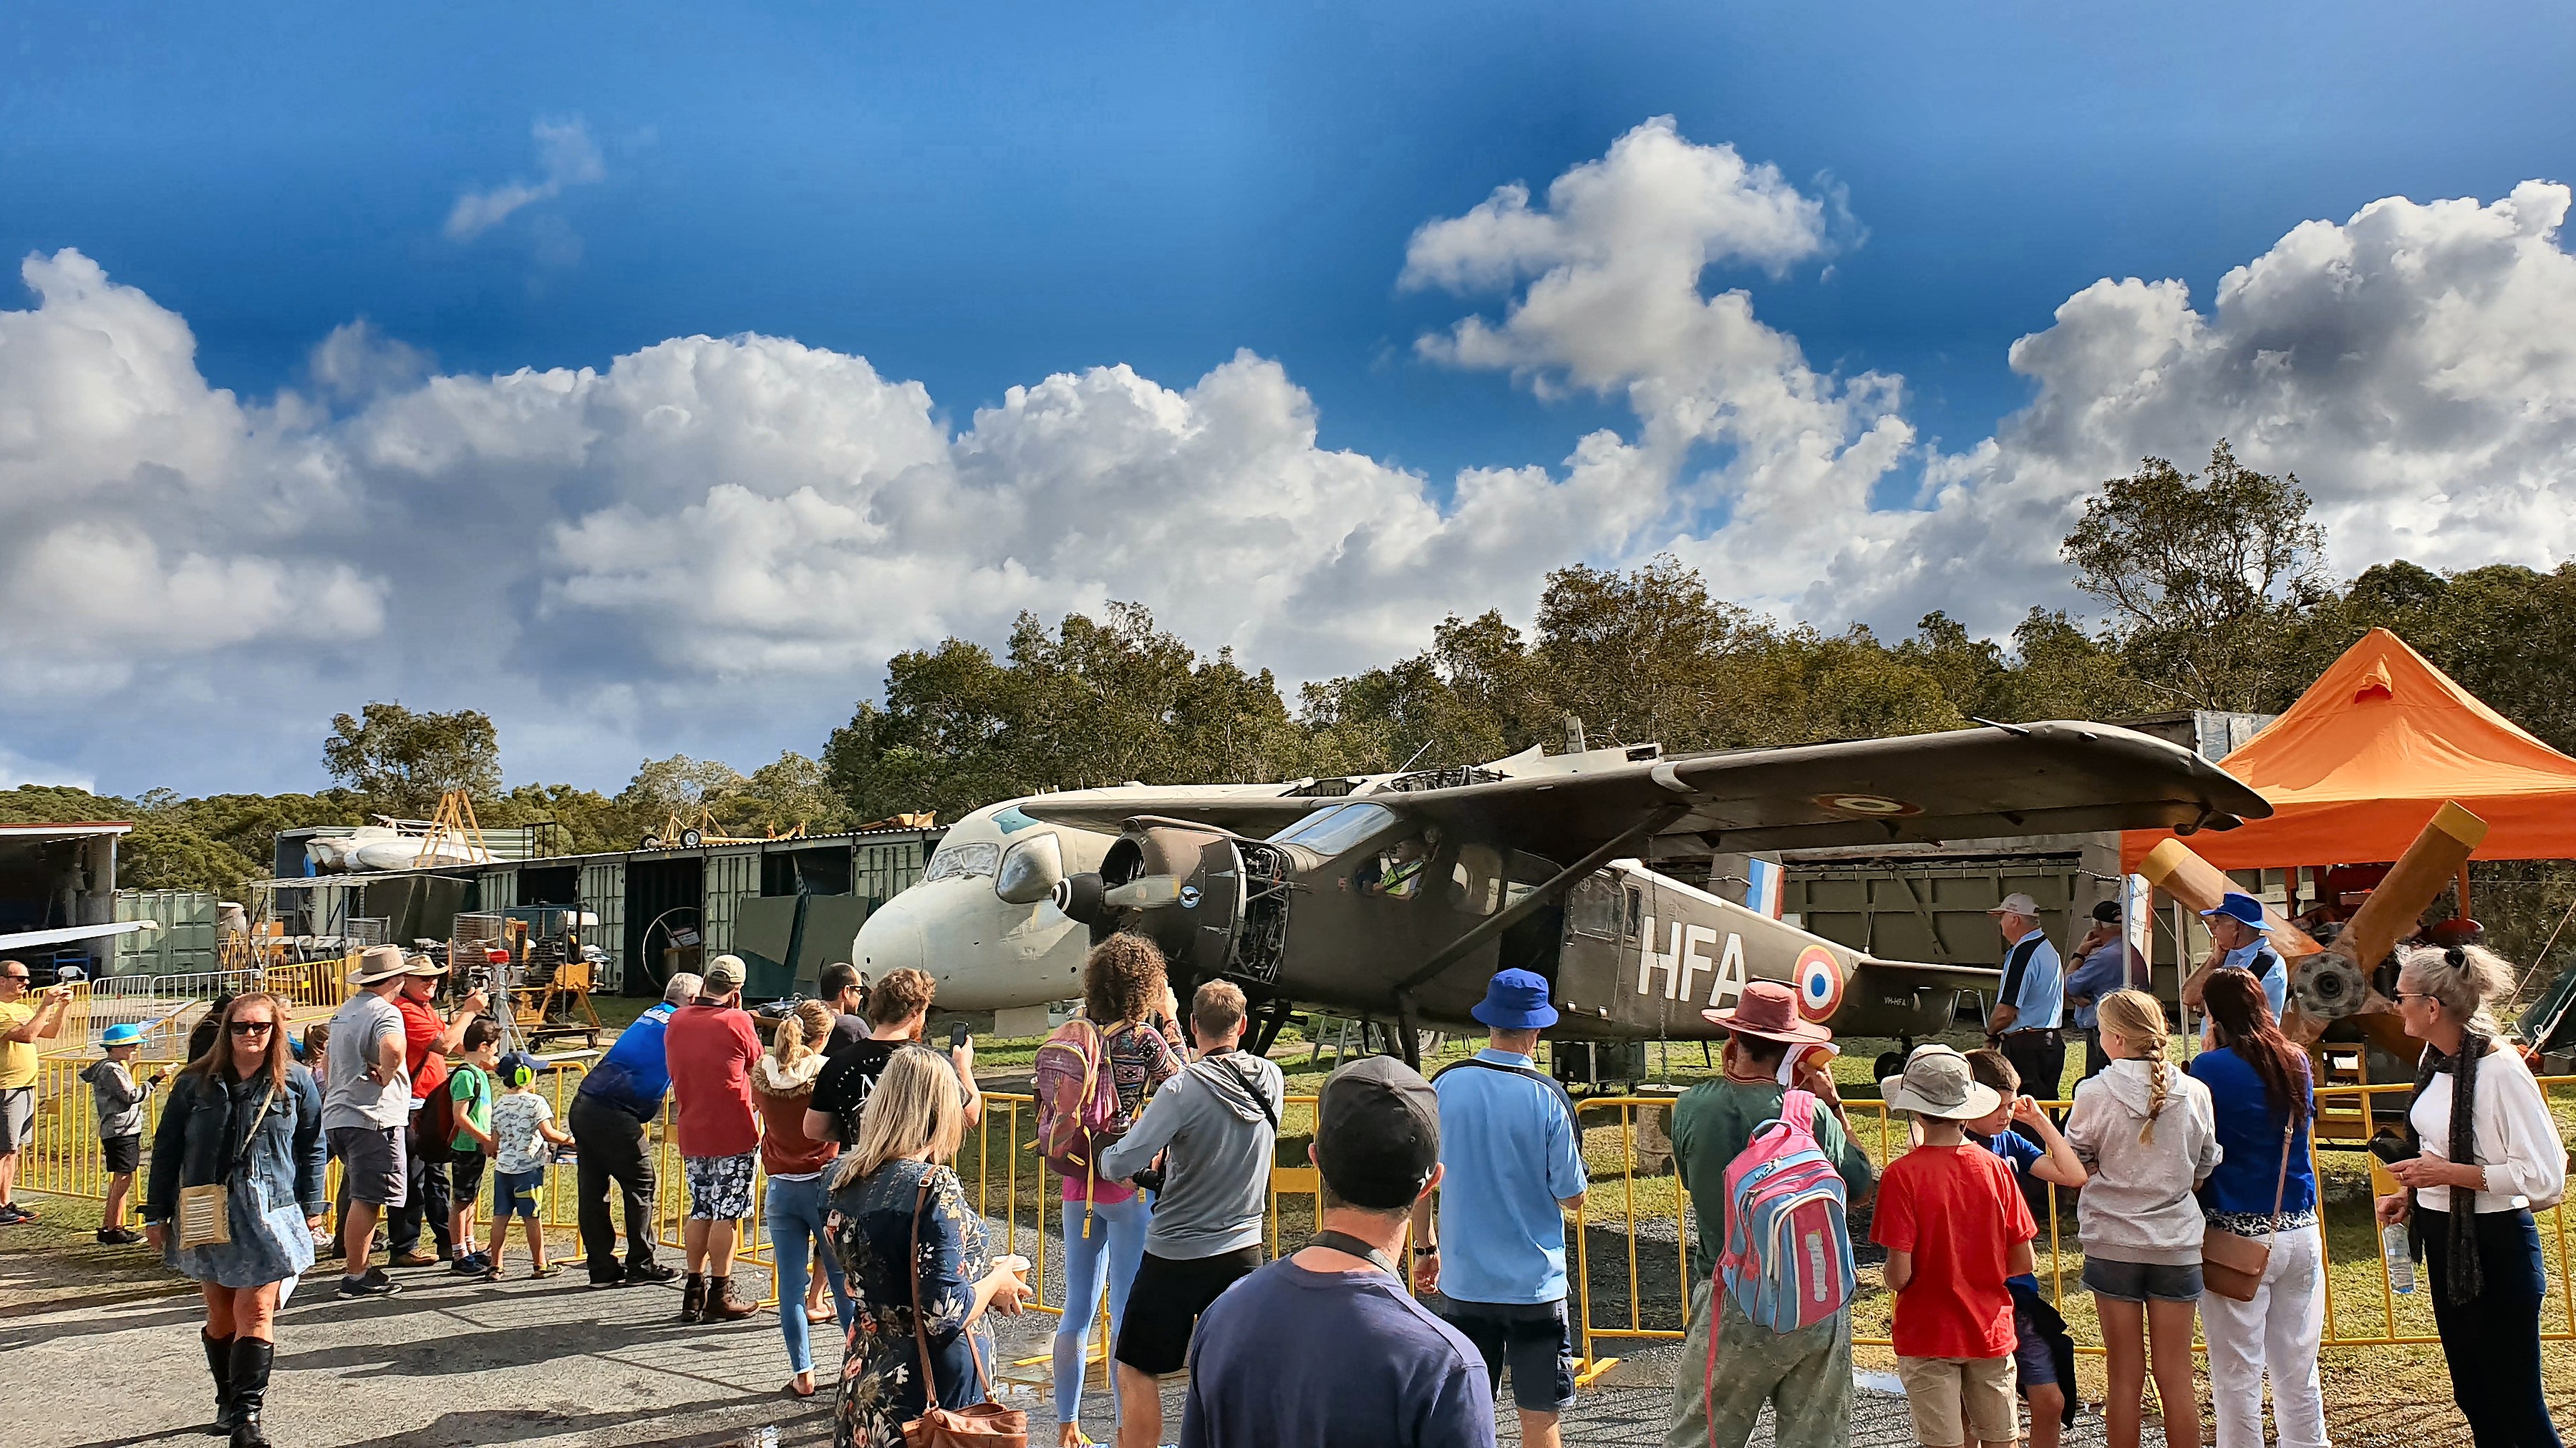
The historic French Broussard was one aircraft which was runup several times and always drew a crowd. This aircraft was designed to meet a French Army requirement back in 1952. It is a six seat utility transport aircraft, similar to the Canadian DHC-2 Beaver and in its day was a major cooperation aircraft and aerial ambulance. Its performance as a short take-off and landing aircraft on bush strips has been described as outstanding however, being nose heavy it was sluggish and difficult to fly.
This particular aircraft was bought by a Denis Harris in 1997 and operated out of Maryborough Qld until its last flight in 2010. It was bought by the QAM in 2014 and after being trucked down from Maryborough, was put on display at the Museum in 2015.
Click the pic below to see and hear the engine run.
|
||||||||||
|
|
||||||||||
|
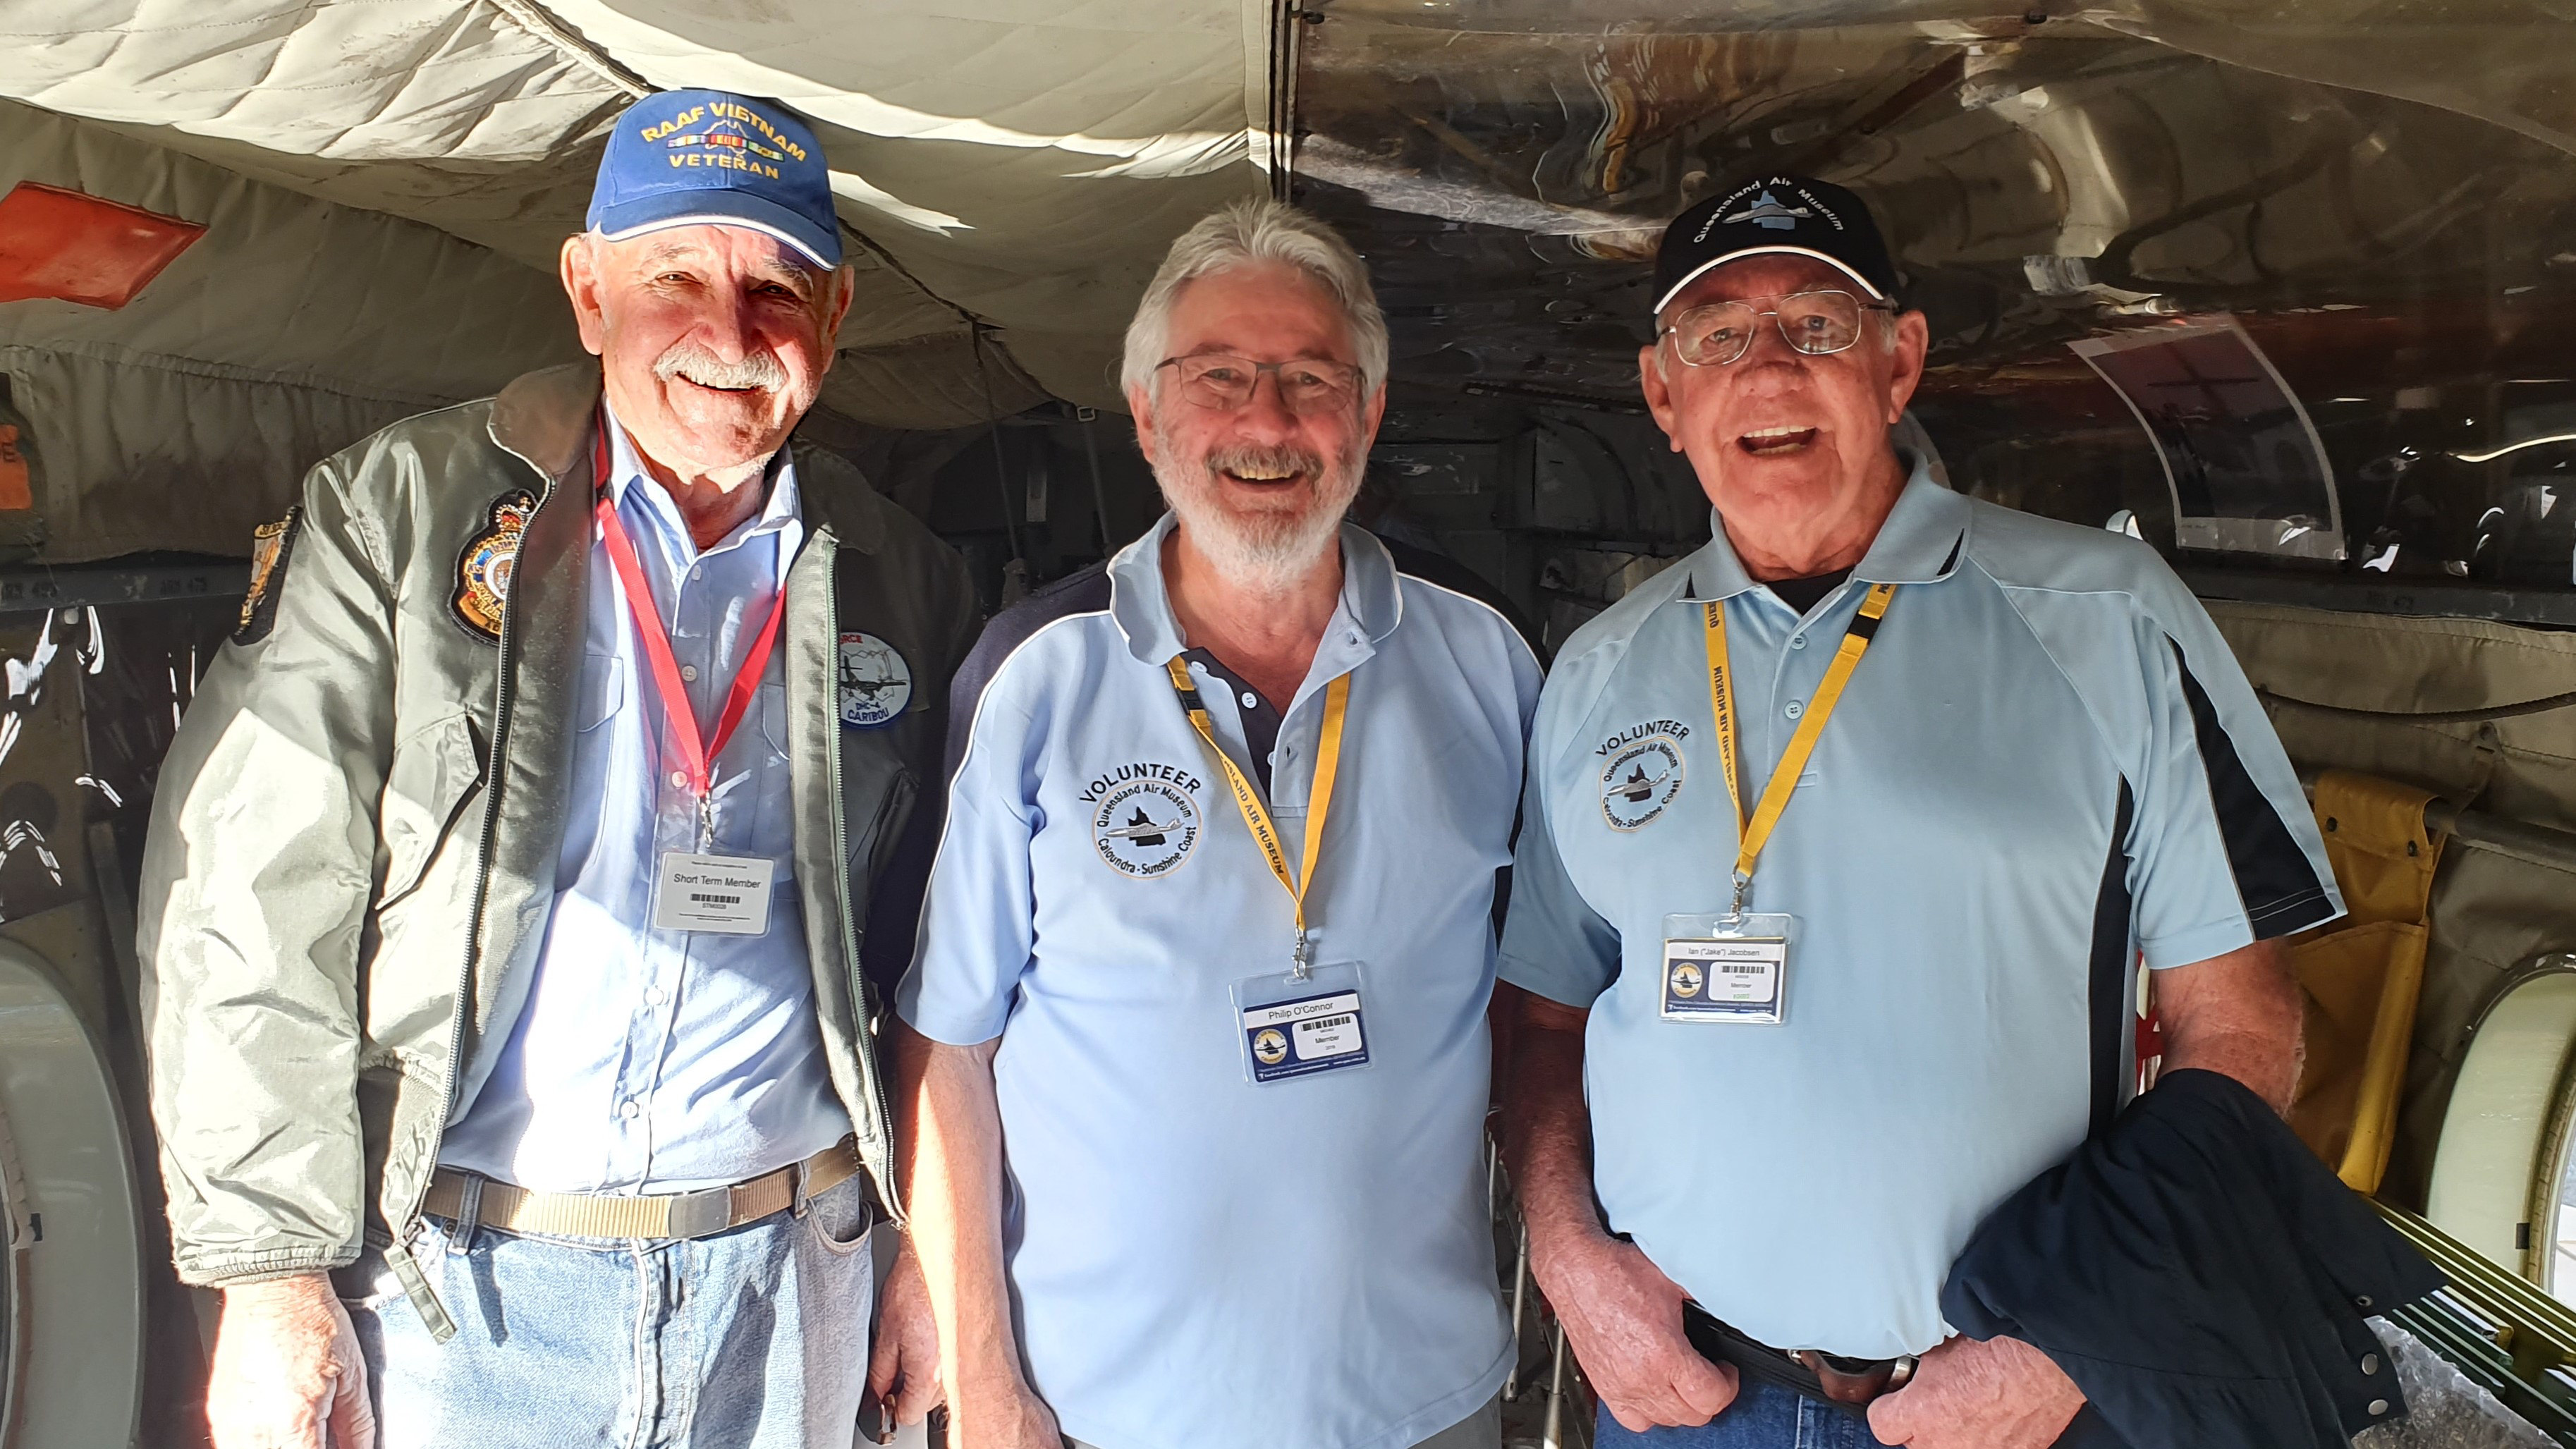
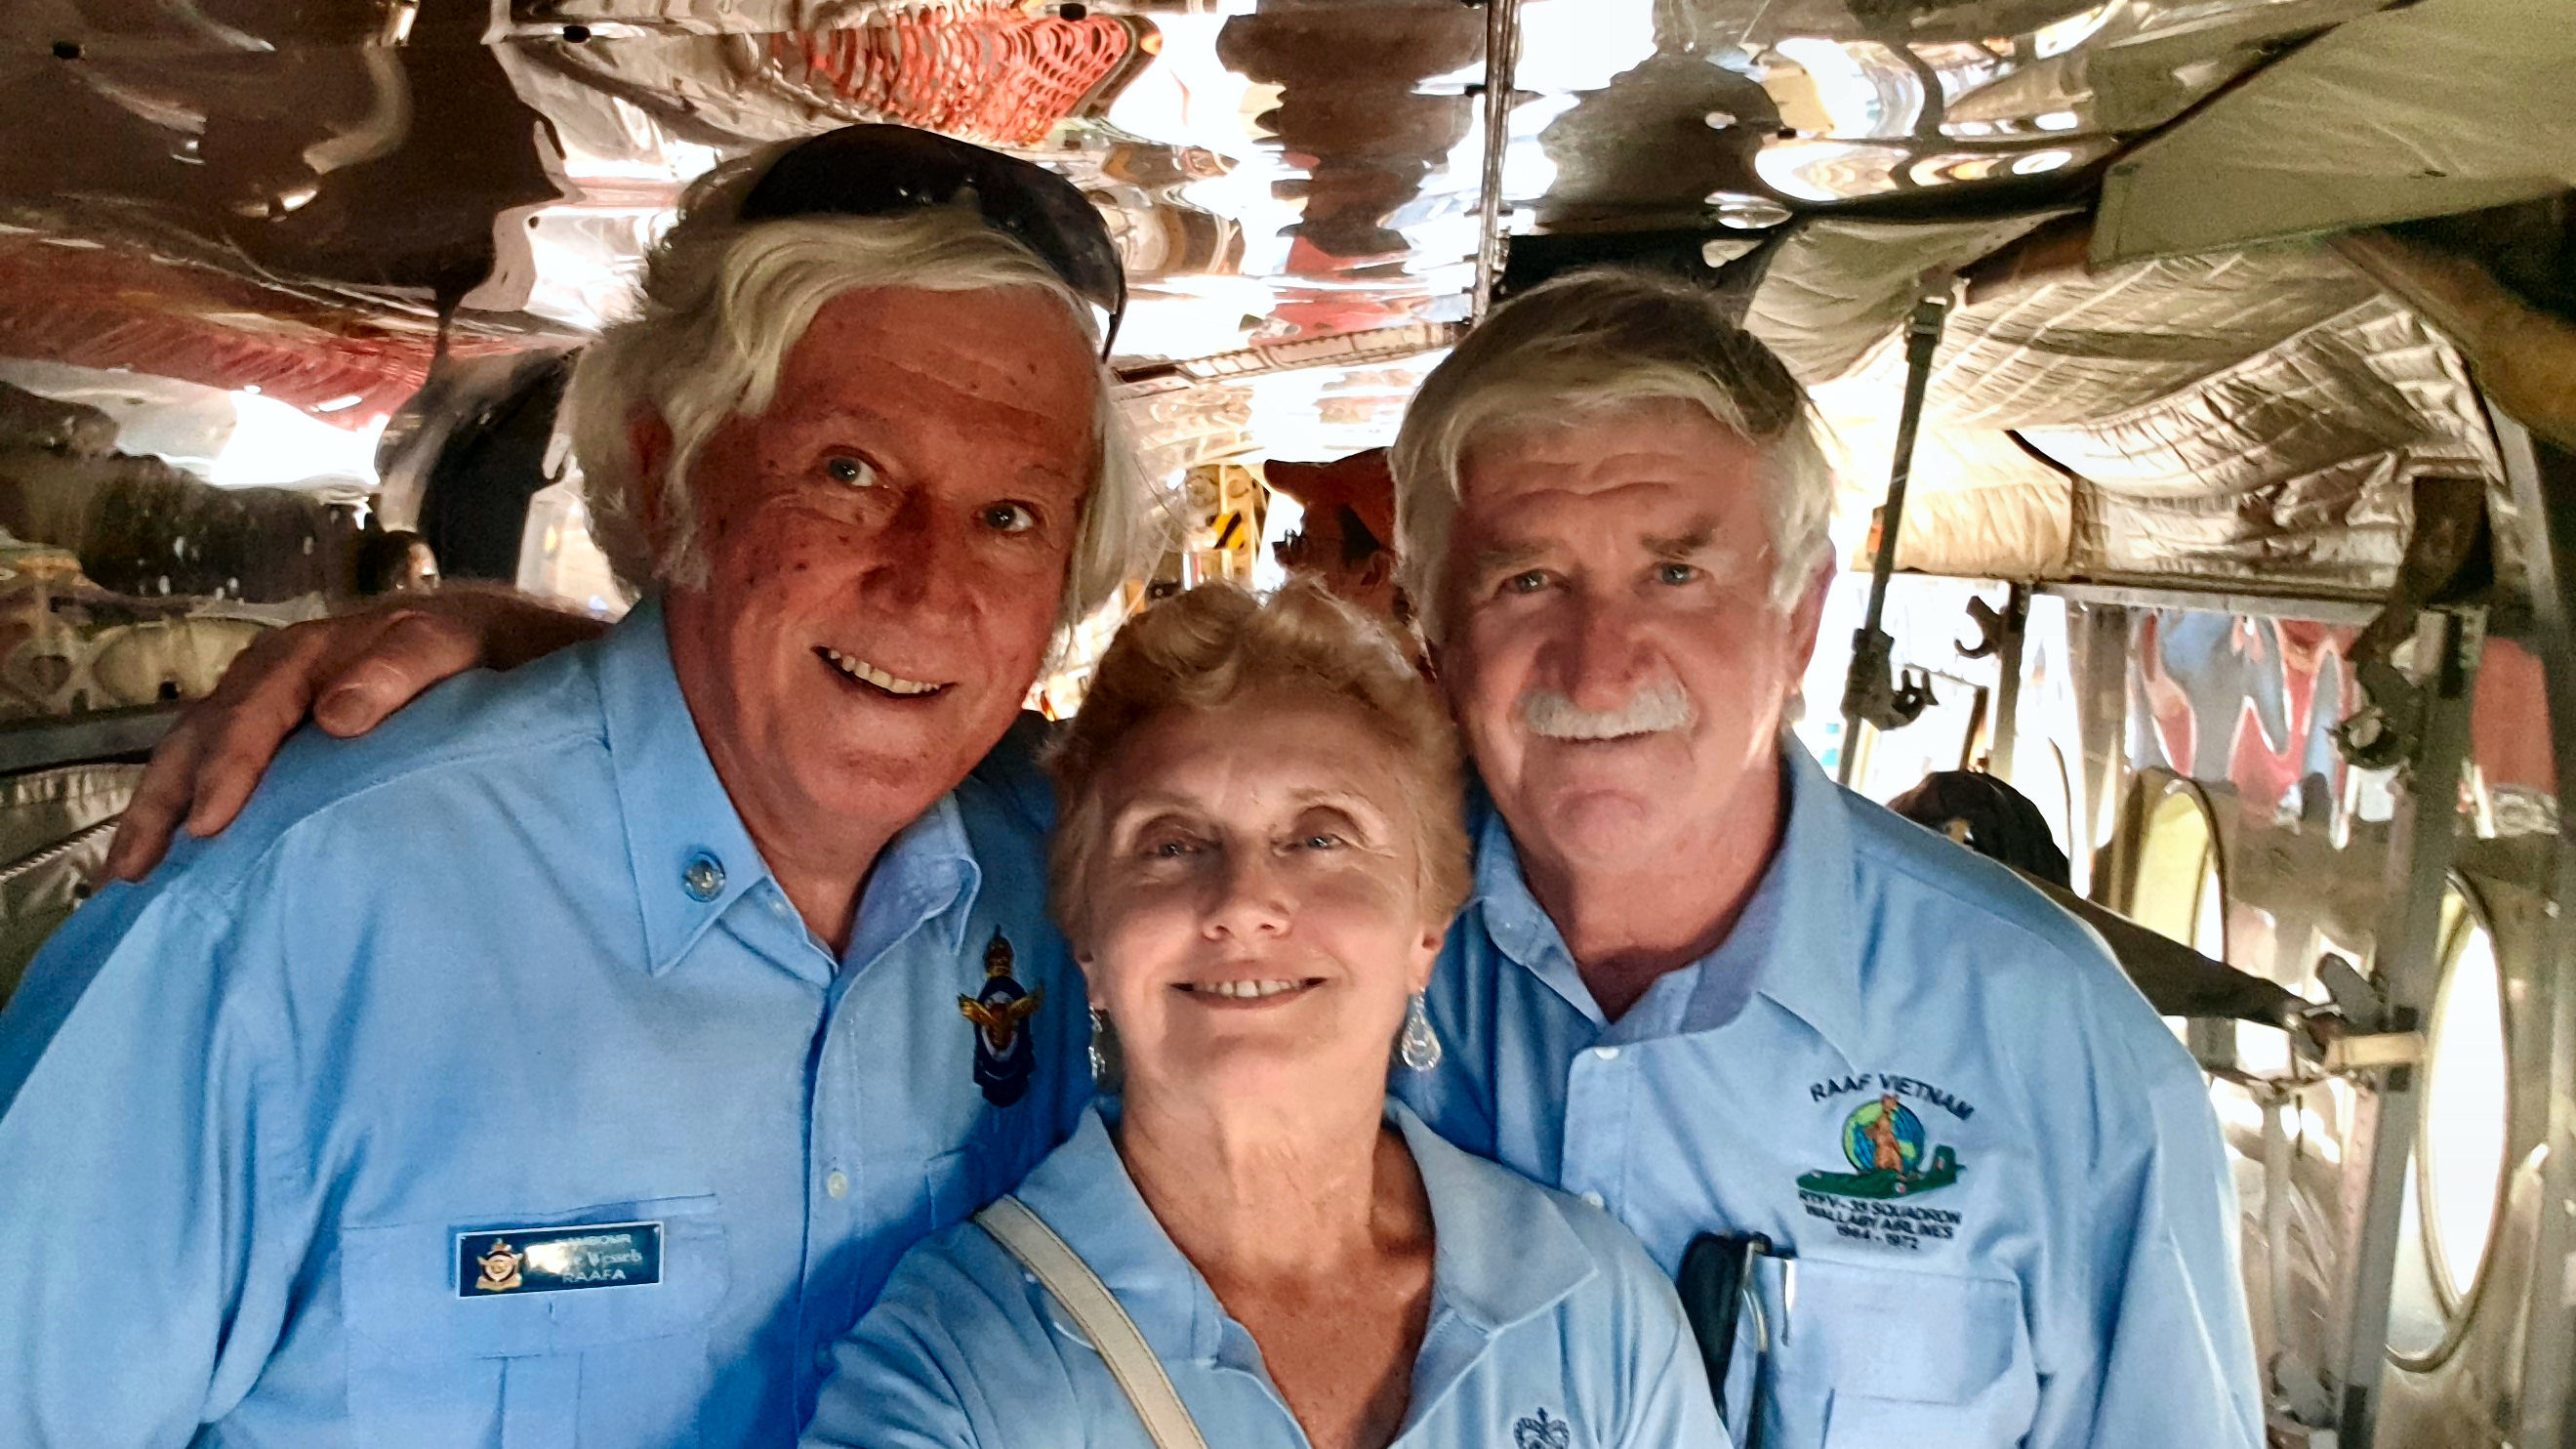
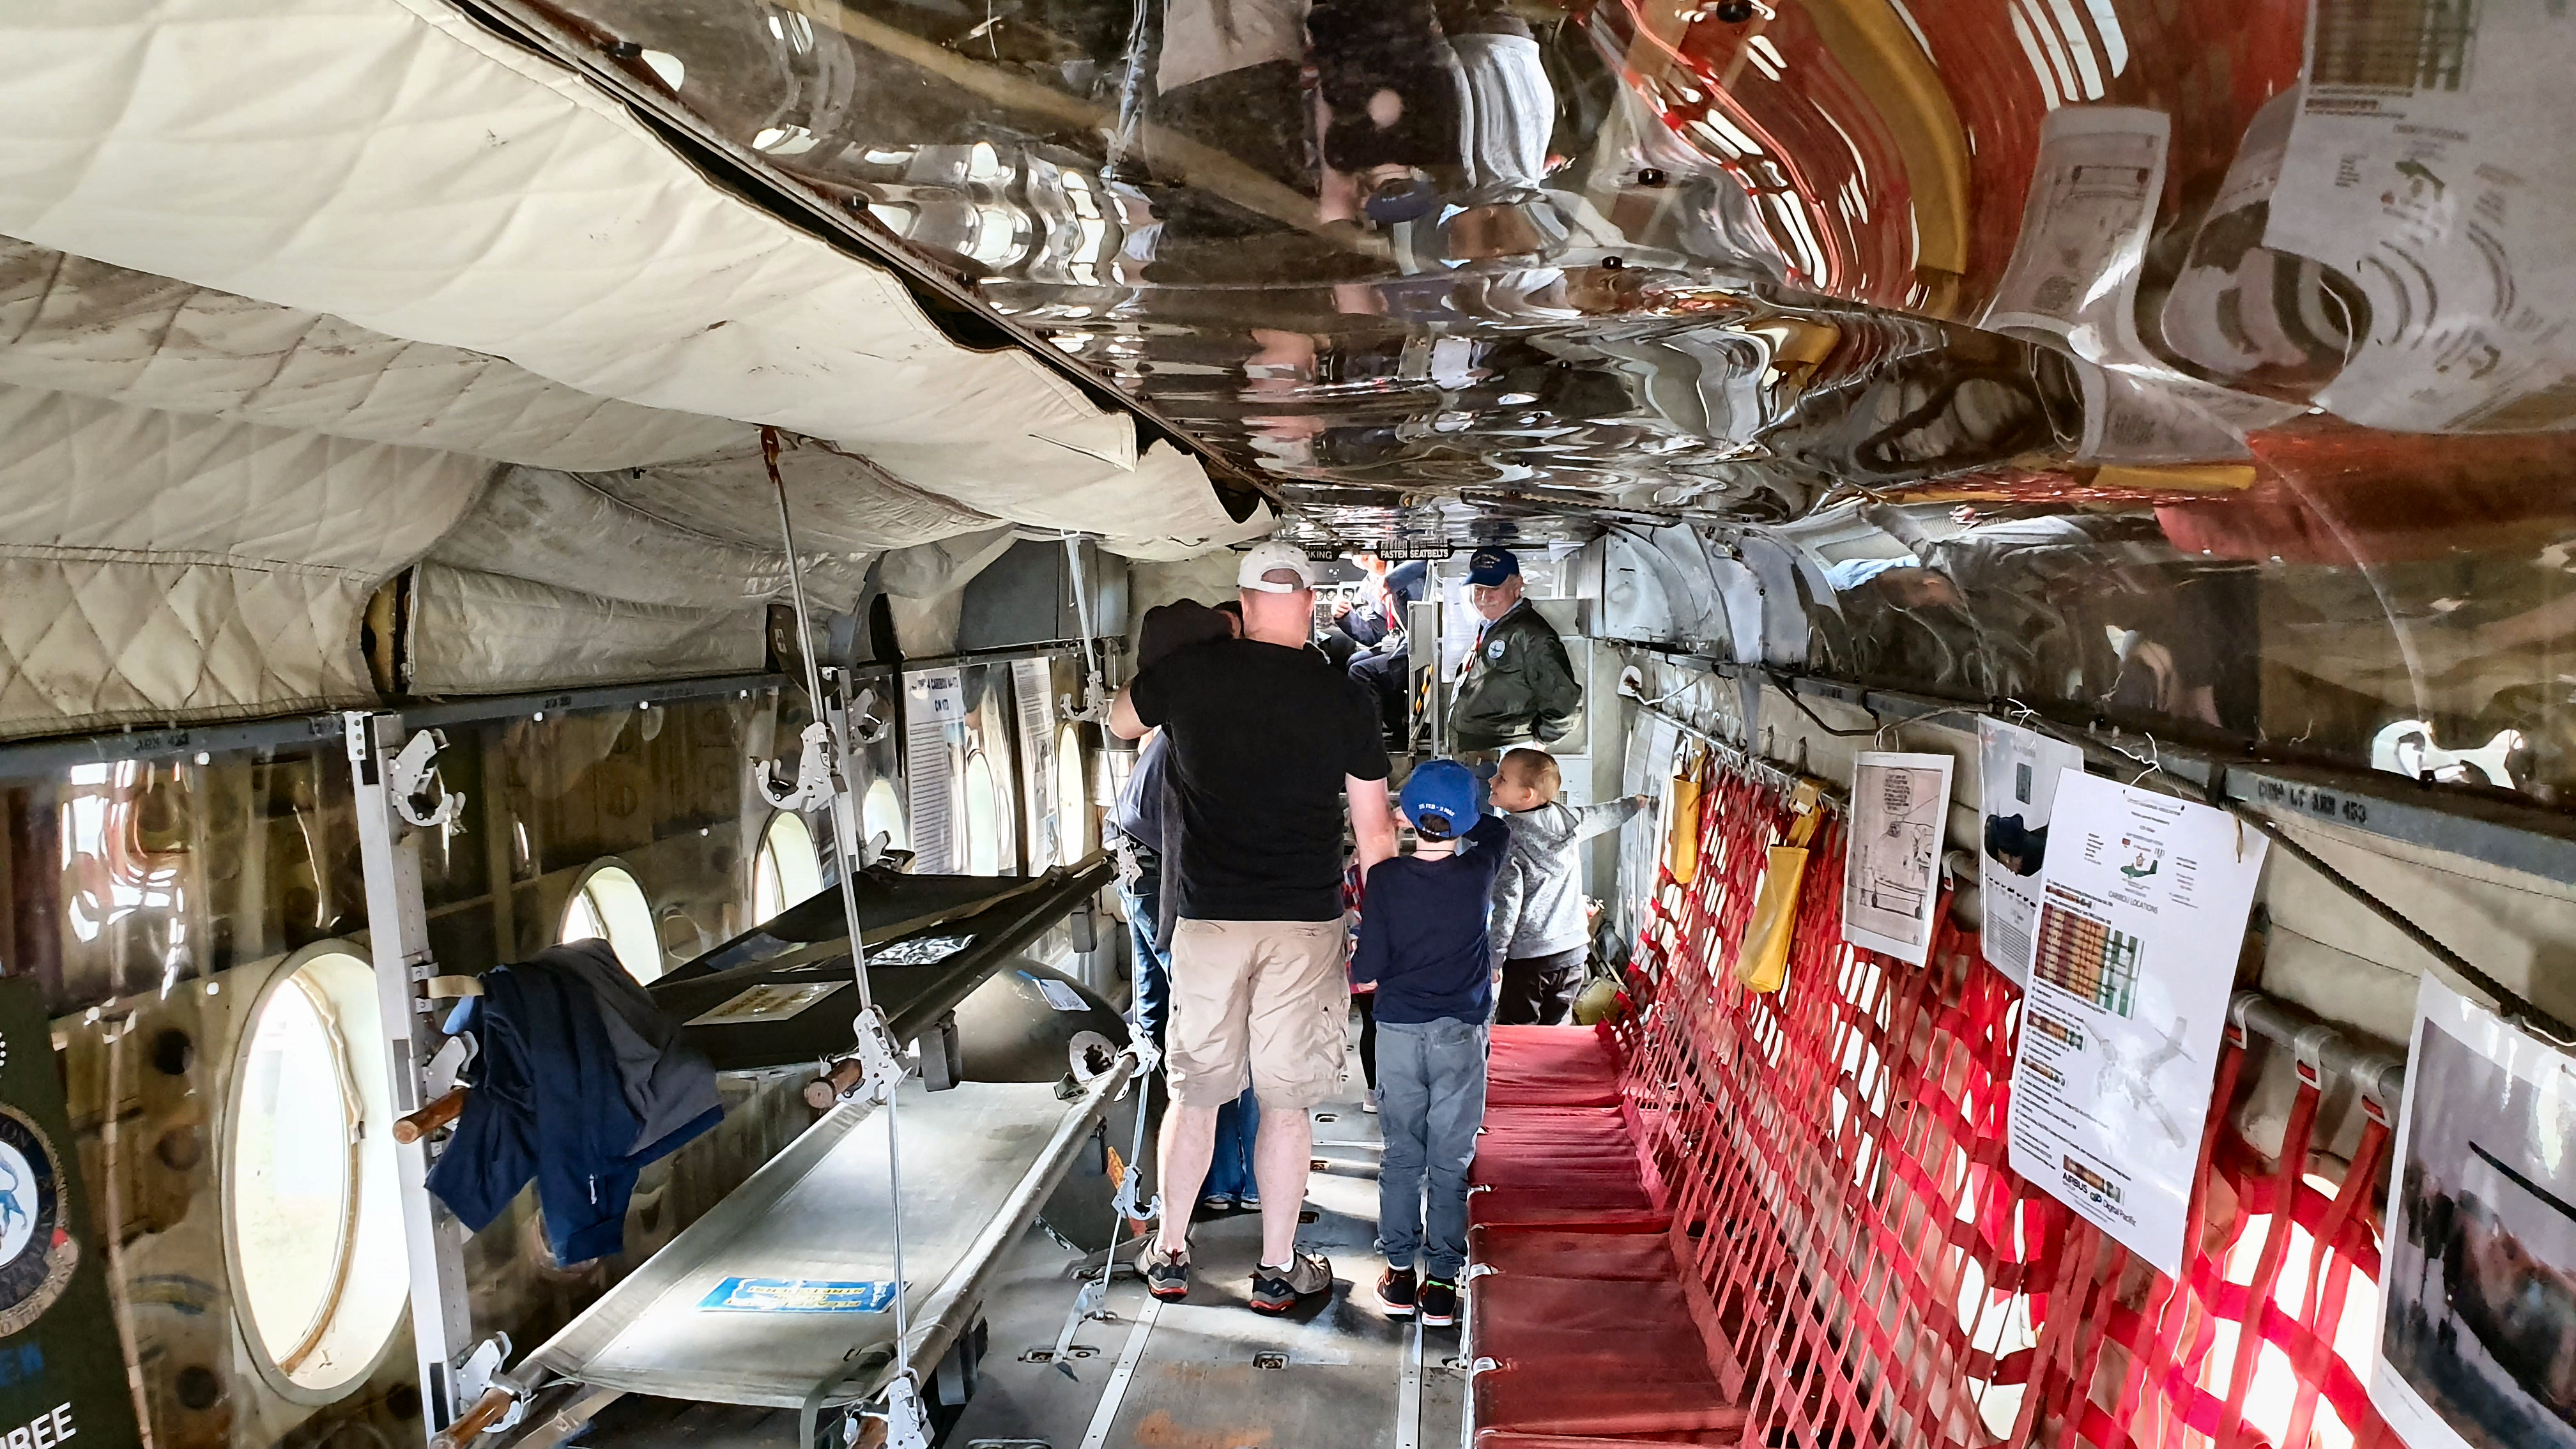
Another favourite with the public was the Caribou – mainly because it was open, people could line up and walk in, it was dry and warm and they could sit in the cockpit and play with the controls. For the kids it was a great treat, they sat wide eyed in the two seats up front and played Pete the Pilot.
Those that volunteered to explain the extraordinary characterises of the old Caribou were:
|
||||||||||
|
|
||||||||||
|
John Griffiths, Phil O’Connor, Jake Jacobsen.
|
||||||||||
|
|
||||||||||
|
Steve Wessels, Valerie Machin, Trev Benneworth.
|
||||||||||
|
|
||||||||||
|
John Griffiths on duty in the old girl.
|
||||||||||
|
Although the crowd numbers were down due to the bad weather, 2500 to 3000 people braved the elements and spent hours tramping through the water or inside the hangar checking out the aircraft.
|
||||||||||
|
|
||||||||||
 |
||||||||||
 |
||||||||||
|
|
||||||||||
|
|
||||||||||
|
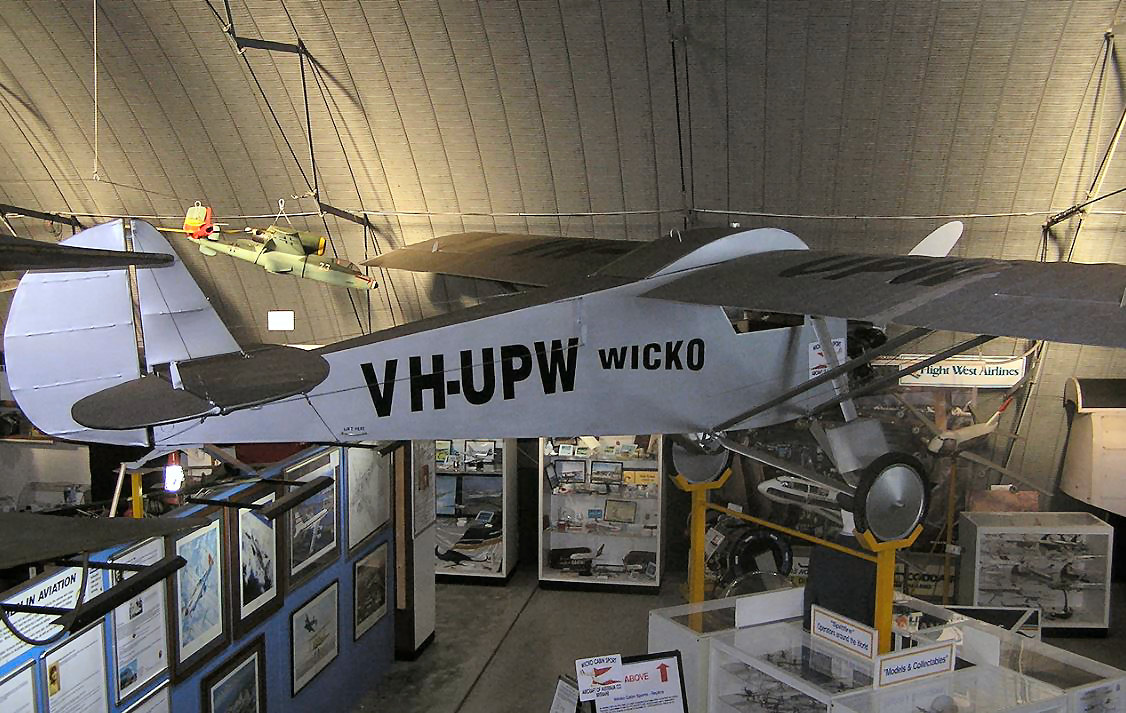
One aircraft on display in the main entrance is a Wicko Cabin Sports replica. The Wicko was the first powered aircraft to be designed and built in Queensland. It was a wood and fabric monoplane designed and built by Geoff Wikner and it first took to the air in January 1931 from Archerfield Airport in Brisbane. The Queensland Air Museum obtained copies of the original plans of this significant aircraft and constructed a replica, which went on display at the museum in 2007.
|
||||||||||
|
|
||||||||||
|
|
||||||||||
|
|
||||||||||
|
If you haven’t been to the QAM, you should definitely add it to your bucket list. The Museum is open every day of the year from 10.00am to 4.00pm, with the exception of Christmas Day.
You can see the aircraft currently on display HERE.
Admission costs are:
|
||||||||||
|
||||||||||
|
|
||||||||||
|
|
||||||||||
|
|
||||||||||
|
|
||||||||||
|
|

 This
type of action was typical all along D Company's assault line and every
time the Australians received fire from a building, tank rounds were
used to breach the walls and a small team of infantry would conduct room
clearance until all resistance was quelled. During the fighting some of
the VC had discarded their uniforms and weapons and attempted to mingle
with the pockets of civilians that were unable to escape. The continued
presence of civilians in the village required the Australians to expose
themselves to extreme danger while trying to usher these groups to the
rear of the battle zone. Others tried to flee the village, or hide in
the small air raid bunkers attached to every house.
This
type of action was typical all along D Company's assault line and every
time the Australians received fire from a building, tank rounds were
used to breach the walls and a small team of infantry would conduct room
clearance until all resistance was quelled. During the fighting some of
the VC had discarded their uniforms and weapons and attempted to mingle
with the pockets of civilians that were unable to escape. The continued
presence of civilians in the village required the Australians to expose
themselves to extreme danger while trying to usher these groups to the
rear of the battle zone. Others tried to flee the village, or hide in
the small air raid bunkers attached to every house.